InWineTory
User Manual – Manage your wine cellar the easy way
Table of Contents
1. Getting Started
1.1 Launching the App
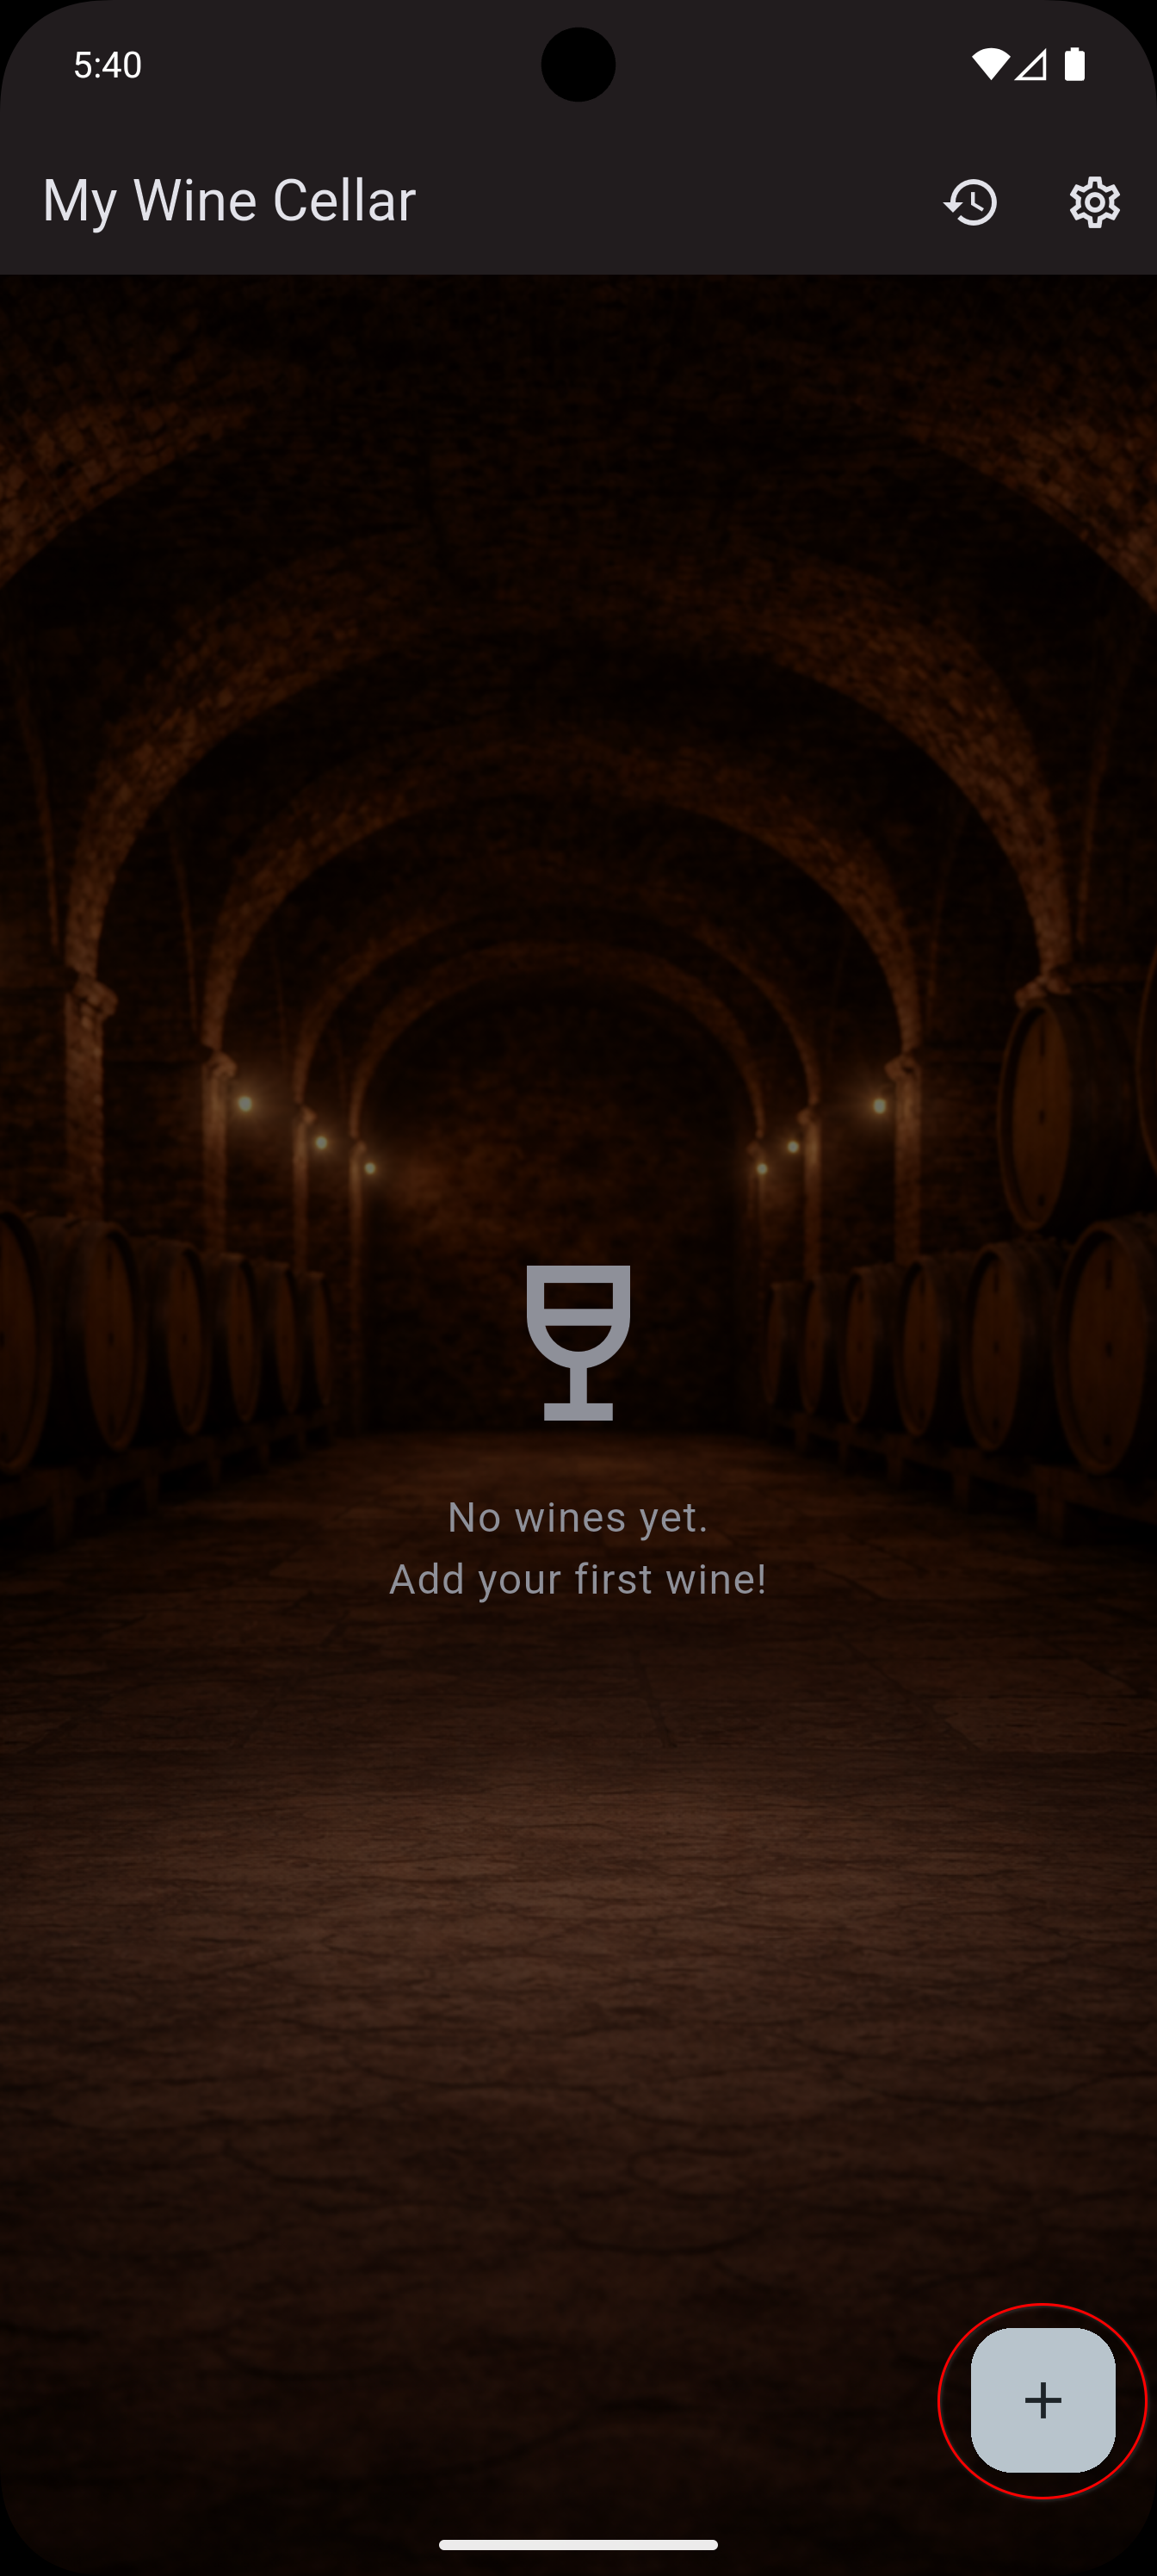
On first launch, InWineTory shows an empty wine list with the message "No wines yet. Add your first wine!"
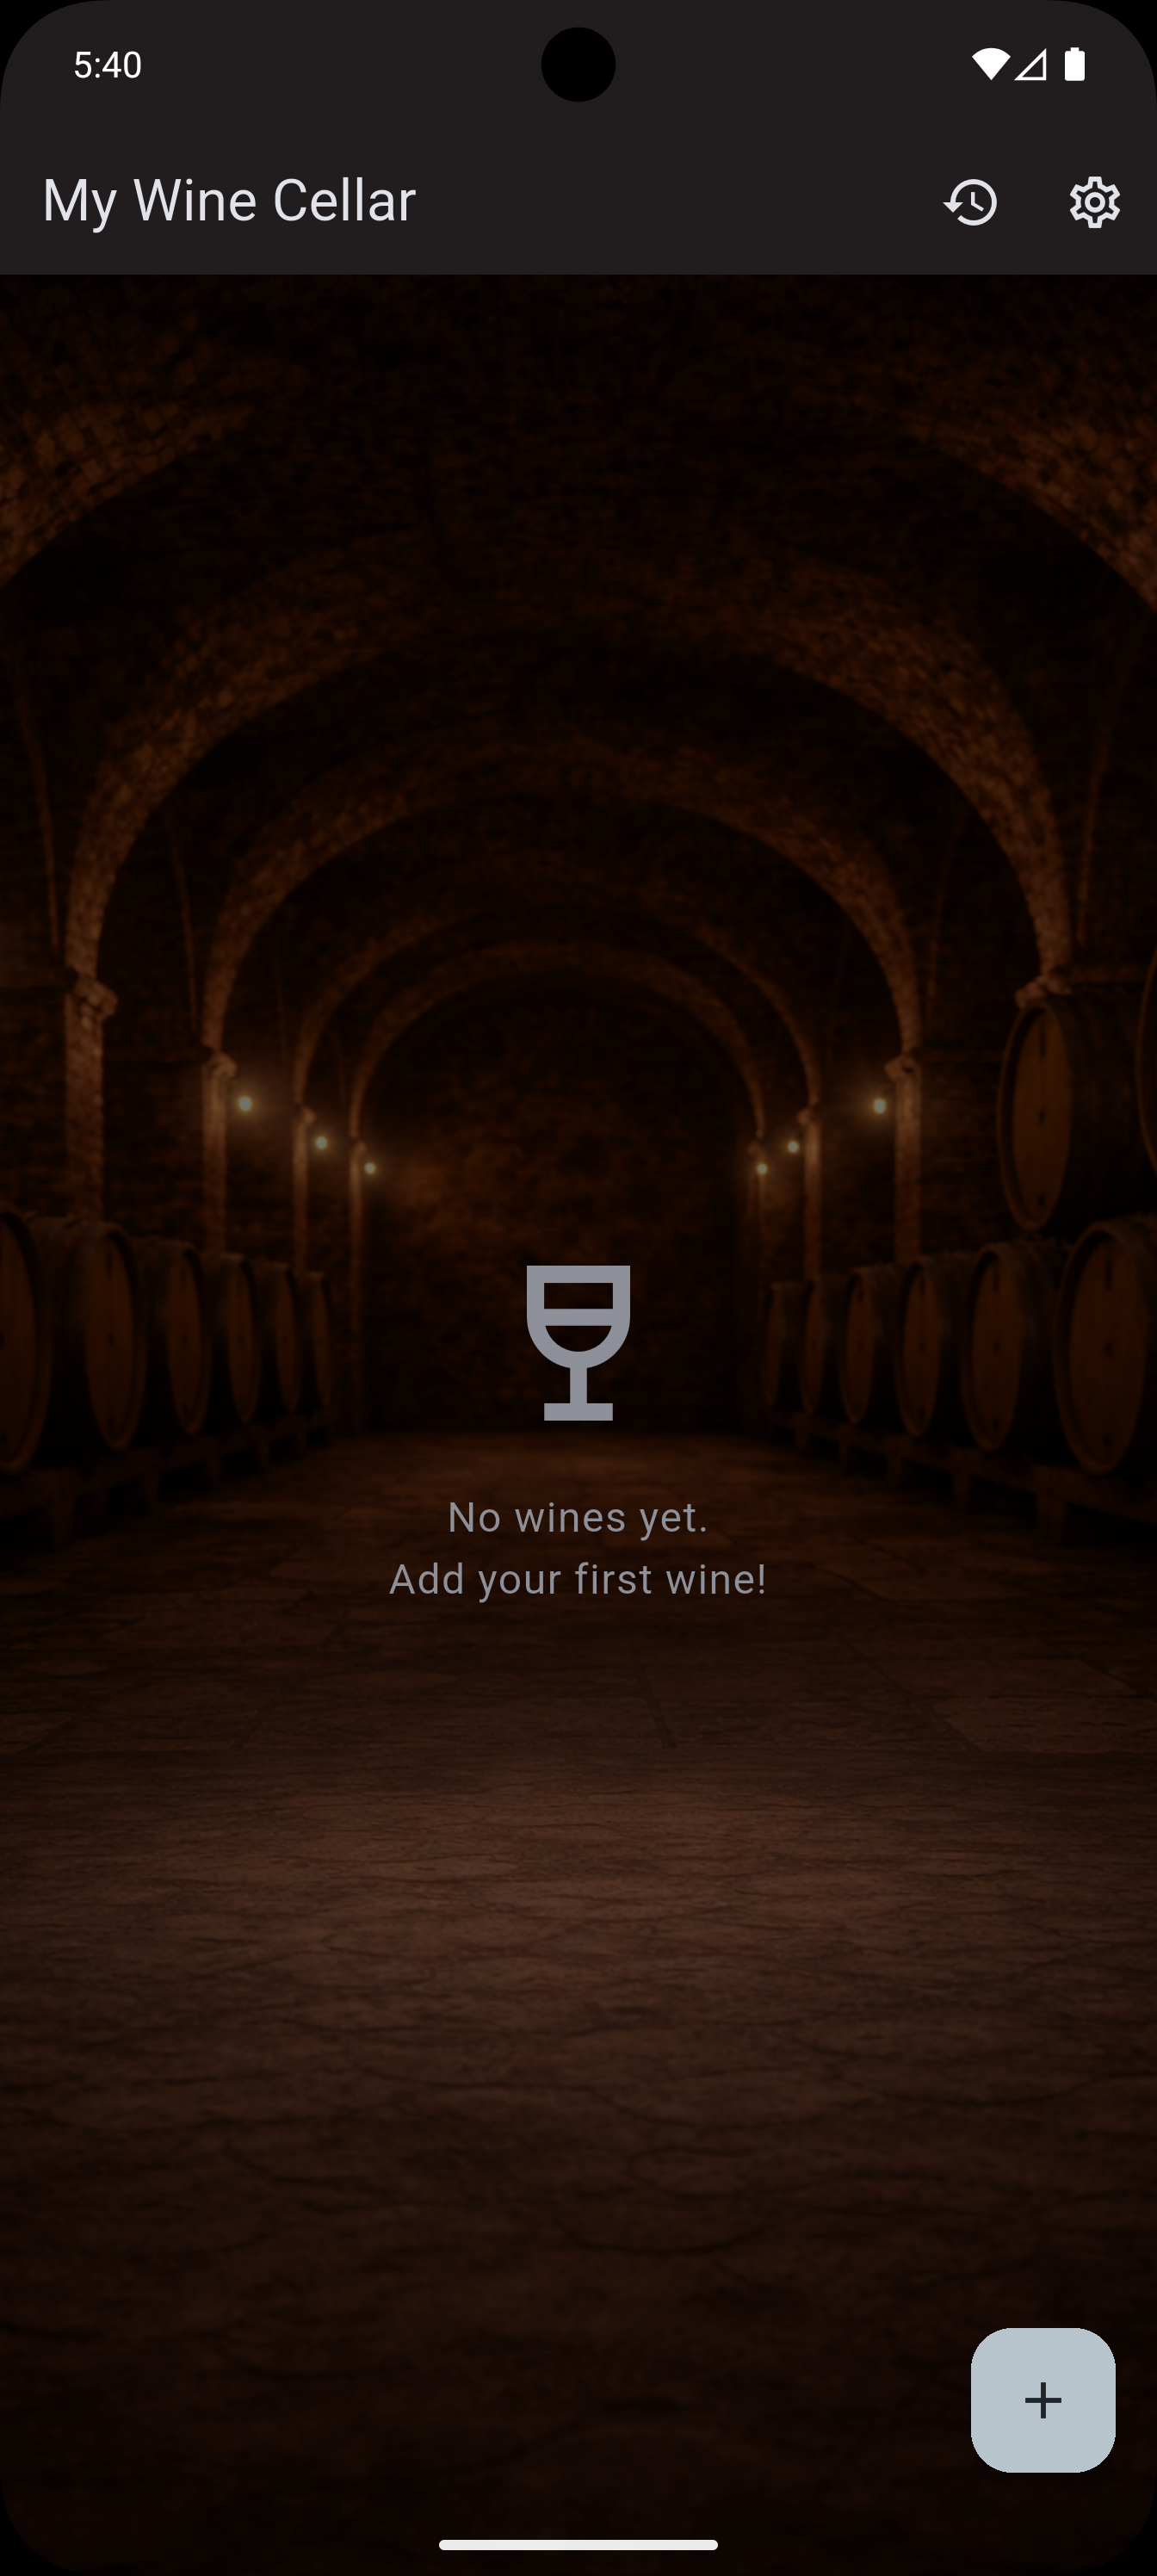
The app stores all data locally on your device – no internet connection required.
1.2 Choosing the Right Mode
InWineTory offers two modes that you can switch at any time:
| Mode | For whom? | Fields |
|---|---|---|
| Beginner | Casual connoisseur, newcomers | Core fields + 5-star rating |
| Enthusiast | Advanced connoisseurs, collectors | All fields + 100-point rating |
Tip: Start in Beginner mode. All your data is preserved when you switch to Enthusiast later – you simply gain access to more fields.
To change: open Settings (gear icon in the wine list) → section Mode.
1.3 Language and Design Settings
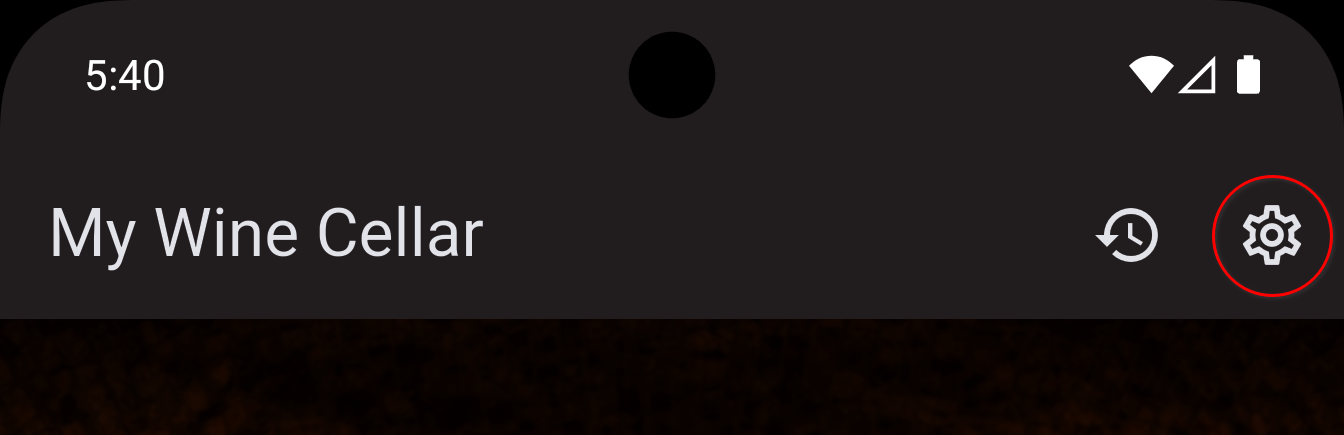
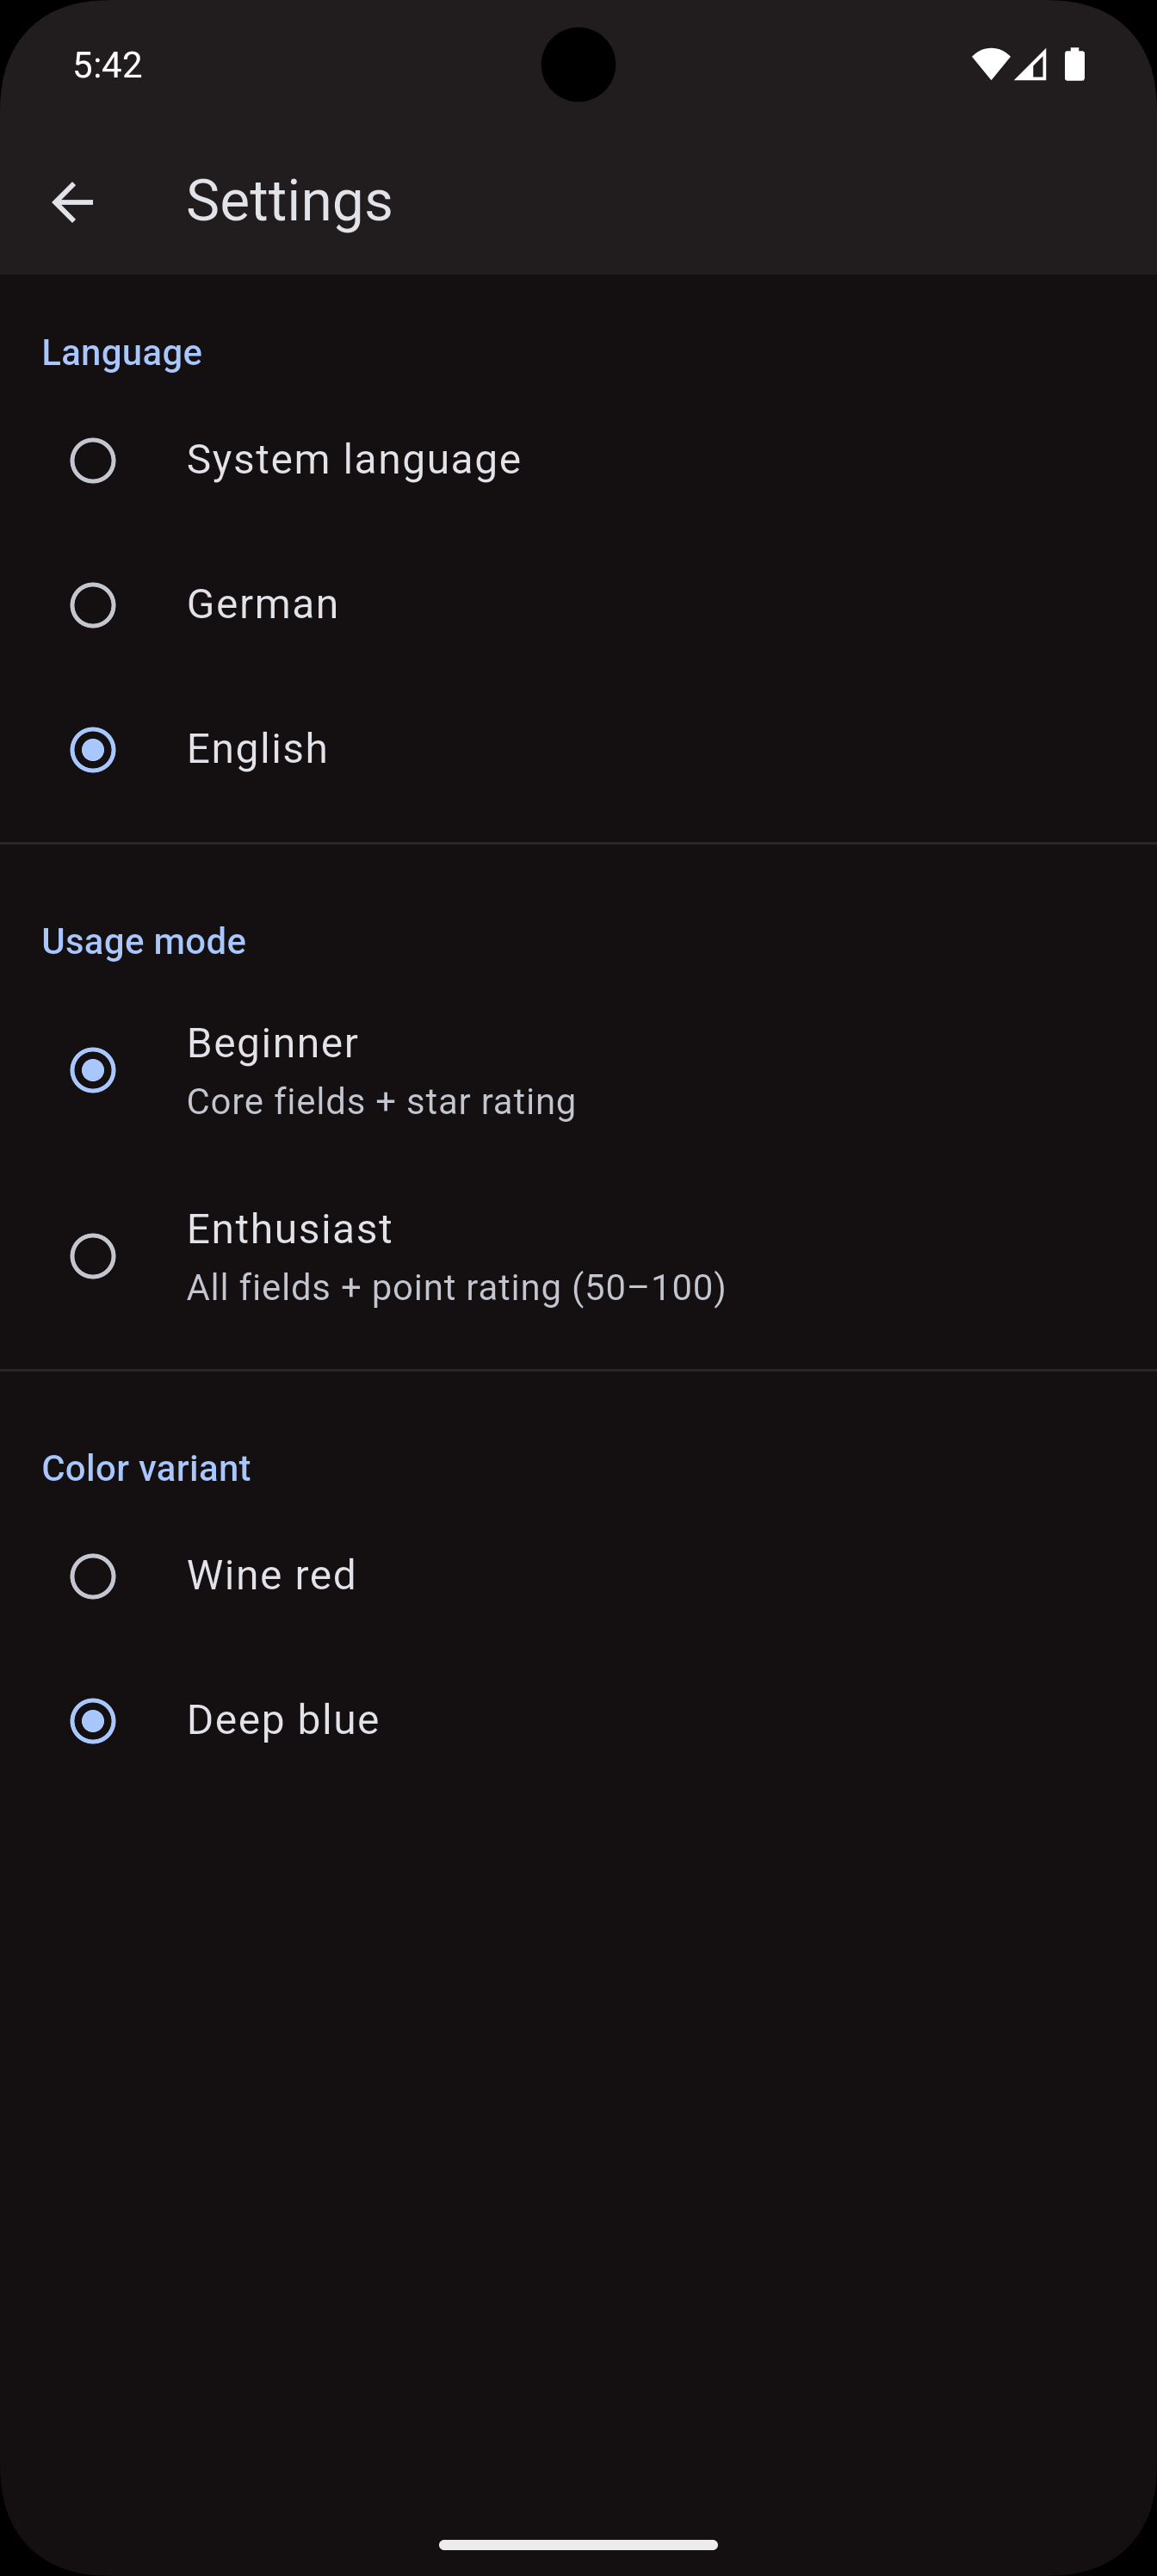
Tap the gear icon in the top-right corner of the wine list to open Settings. There you can immediately:
- Switch the language between German and English
- Change the color theme (Wine Red or Dark Blue)
All changes take effect immediately – there is no Save button.
2. Managing Your Wine Collection
2.1 Overview: The Wine List
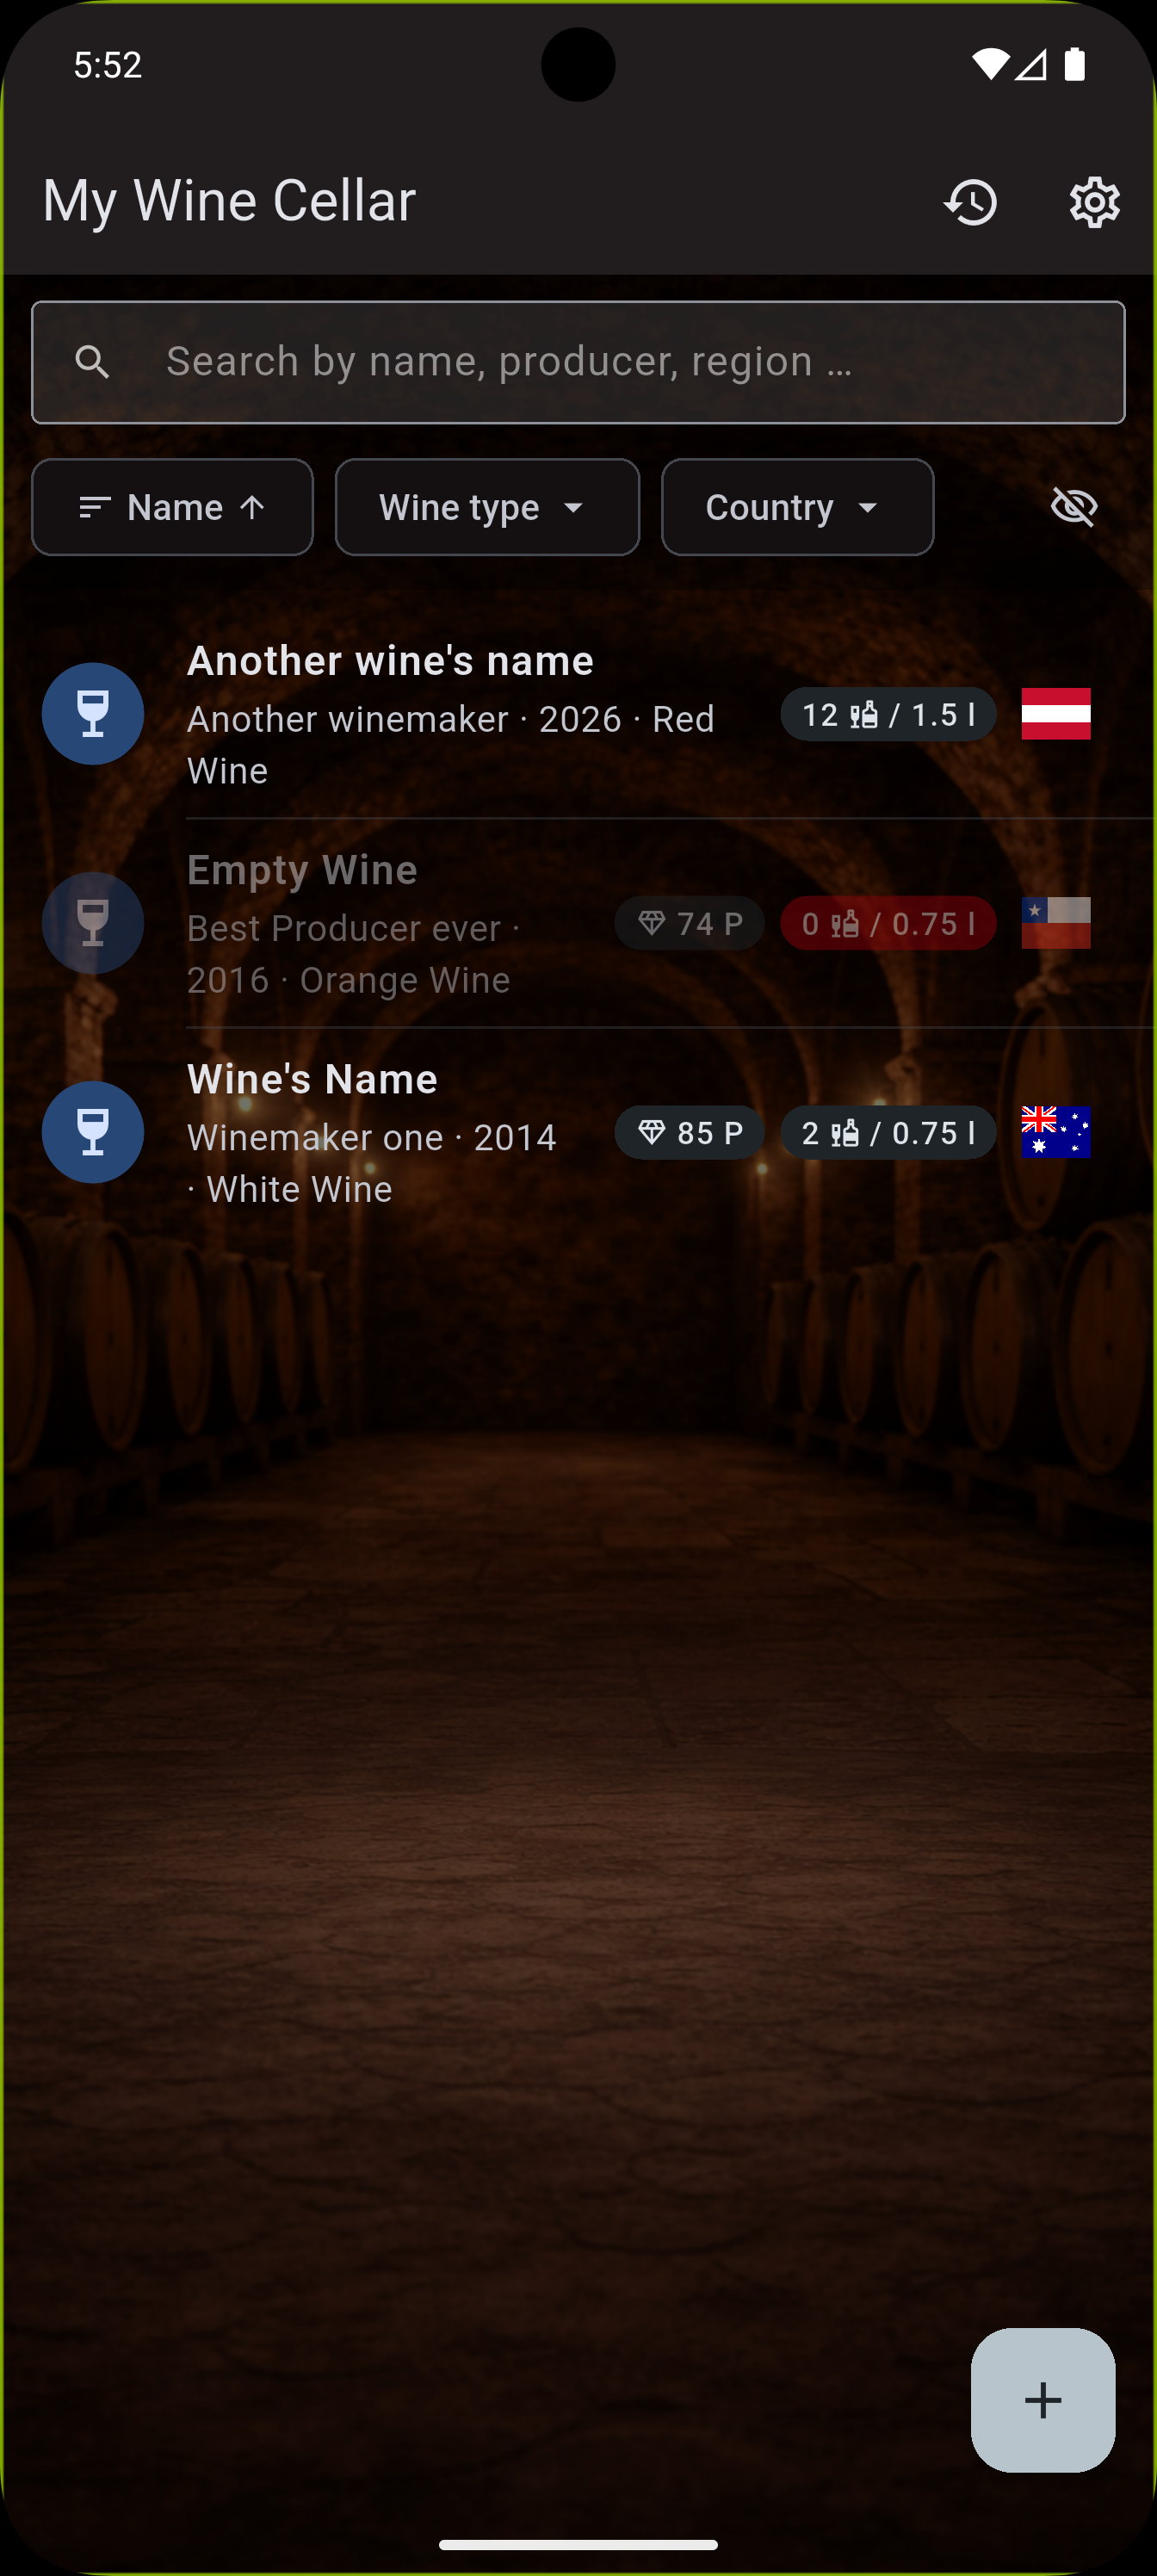
The wine list is the heart of the app. It shows all wines in your cellar as clear, scannable cards.
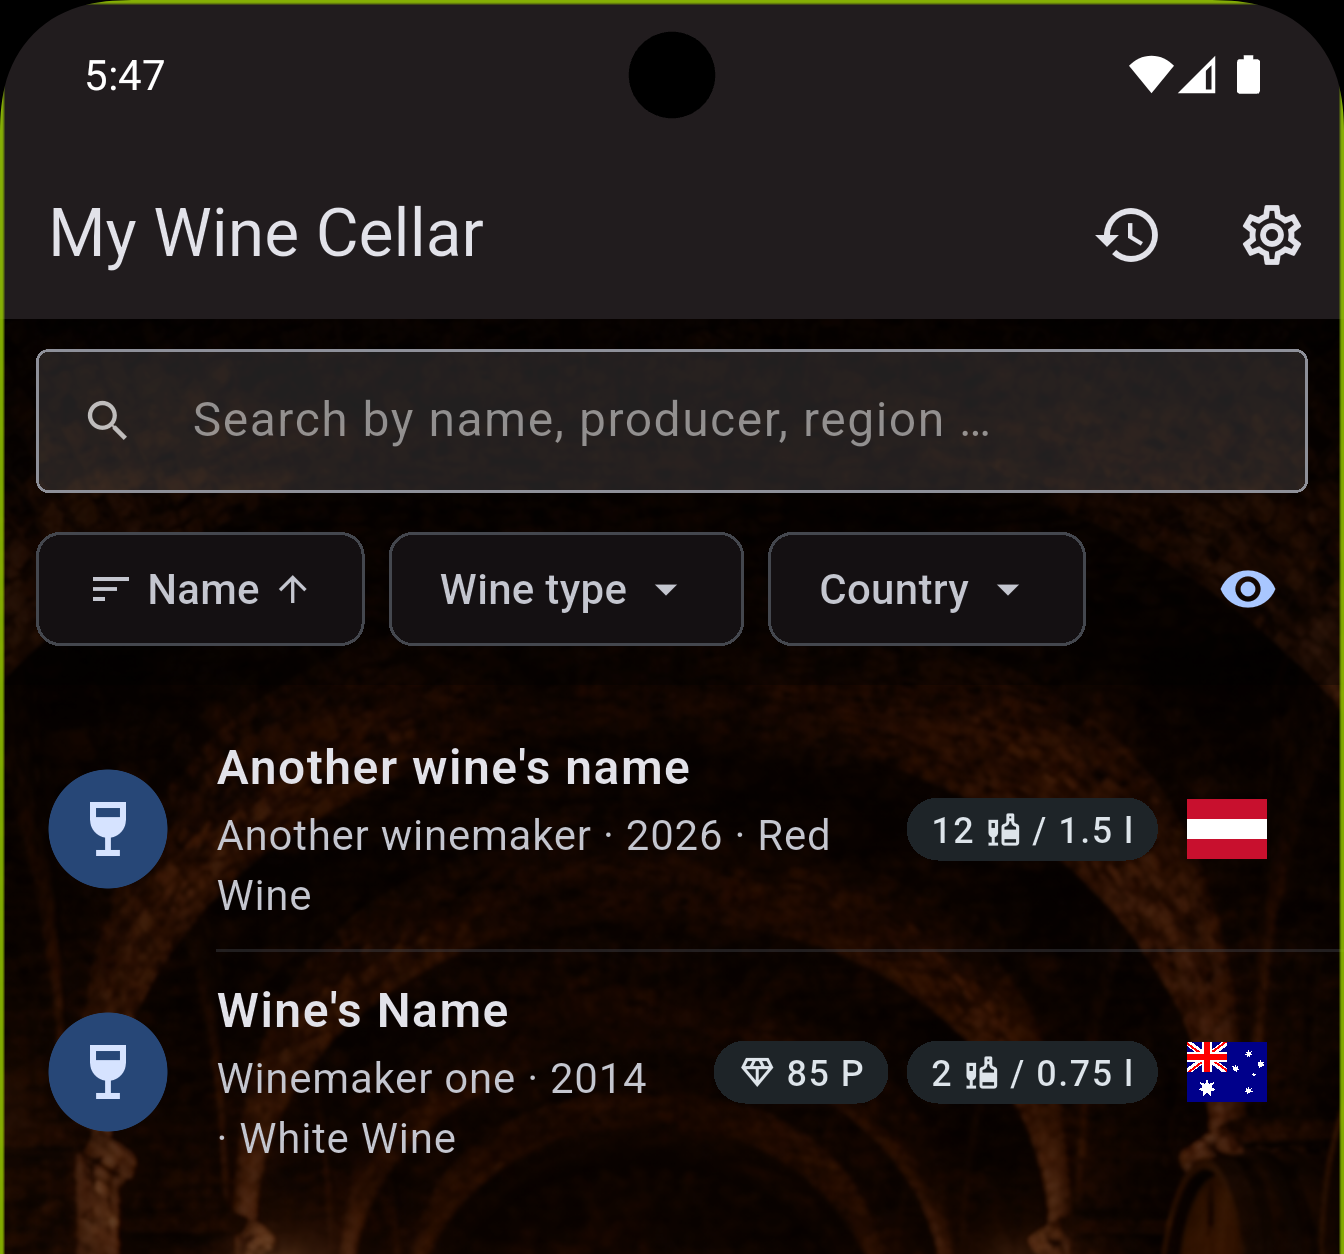
What you see at a glance – each card shows:
- Wine name
- Producer / Winery
- Vintage · Wine type
- Rating (stars or points, depending on mode)
- Stock (number of bottles + bottle size)
- Country (country flag)
Wines with stock 0 are shown greyed out and hidden by default (see Filters).
Navigation elements:
| Element | Function |
|---|---|
| History icon (AppBar) | Open global history |
| Gear icon (AppBar) | Open Settings |
| Search icon + search field | Search the wine list (free text) |
| Sort chip (with arrow) | Change sort order |
| "Type" chip | Filter by wine type |
| "Country" chip | Filter by country of origin |
| Eye icon | Toggle availability filter |
| ⨁ (bottom right) | Add a new wine |
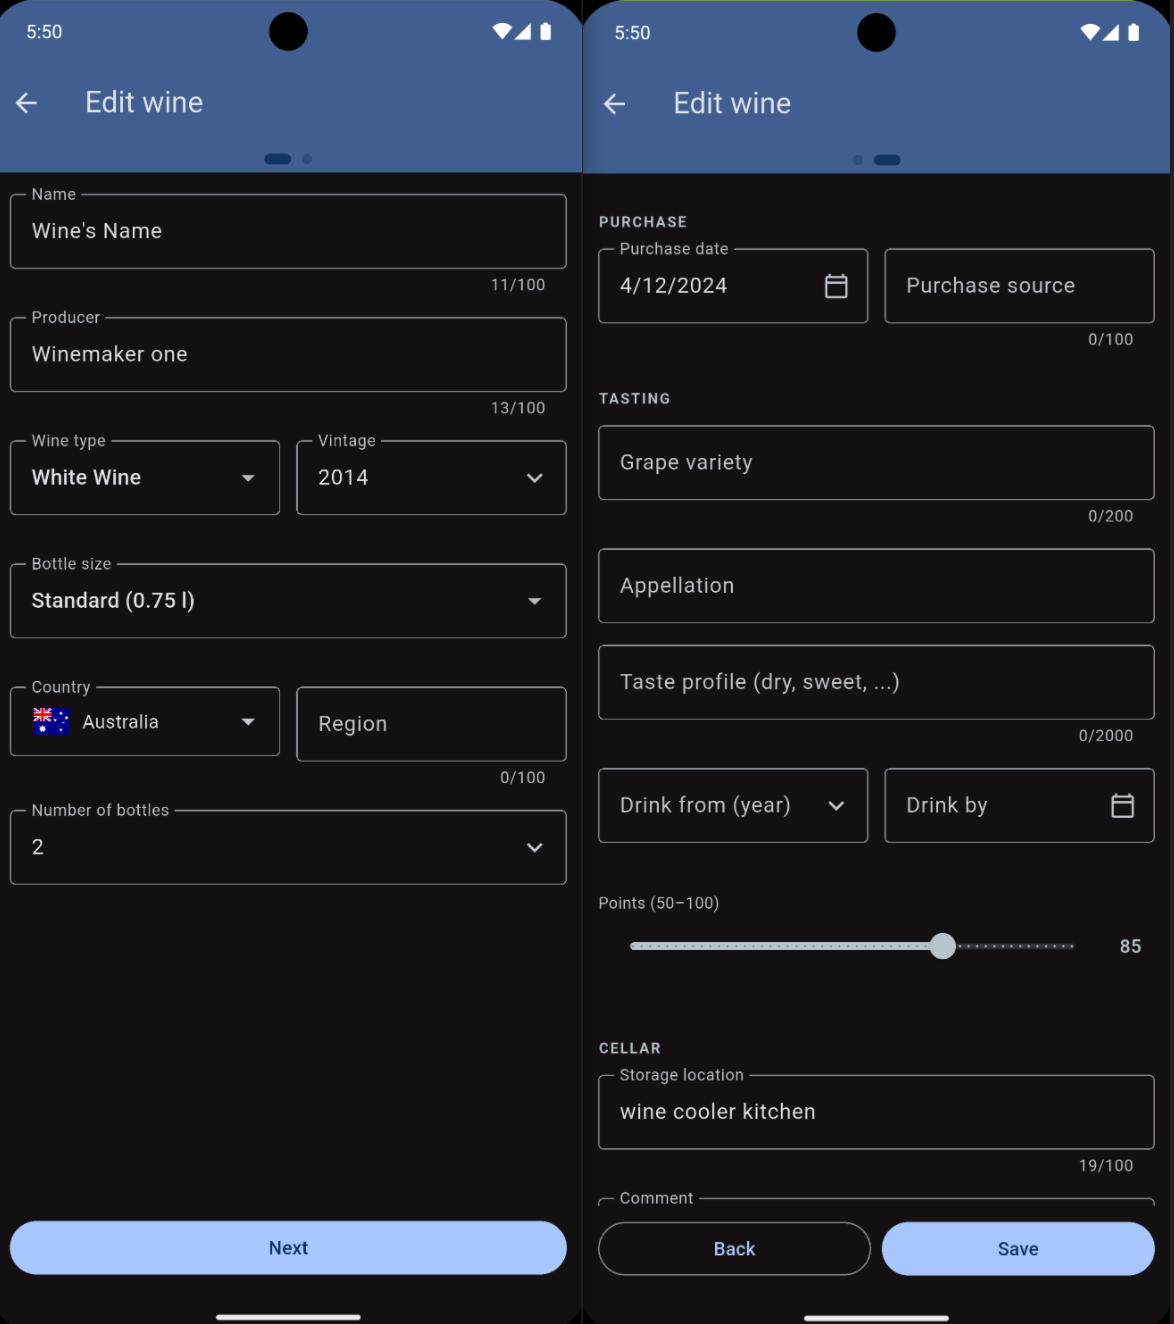
2.2 Adding a New Wine
Tap the round plus button (bottom right) in the wine list. The form is split into two steps:
Step 1: Identity & Cellar
Required fields (marked with *):
| Field | Description |
|---|---|
| Name * | The wine name, e.g. "Château Margaux" |
| Producer / Winery * | Manufacturer or winery |
| Wine type * | Red, White, Rosé, Sparkling, Orange, Dessert, Port, Sherry, Madeira |
| Vintage * | The harvest year (e.g. 2018) |
Optional fields in Step 1:
| Field | Description |
|---|---|
| Bottle size | Half (0.375 l), Standard (0.75 l), Magnum (1.5 l), Double Magnum (3.0 l), Other |
| Country | Country of origin (selection with flag) |
| Region | Enthusiast only – e.g. "Burgundy", "Moselle" |
| Stock | Number of bottles in your cellar (default: 1) |
Tap "Next" once all required fields are filled in.
Step 2: Optional Details
| Field | Description | Mode |
|---|---|---|
| Purchase date | When was the wine purchased? | Beginner + Enthusiast |
| Purchase source | Retailer, winery, gift, ... | Beginner + Enthusiast |
| Rating (1–5 stars) | Personal assessment | Beginner |
| Grape variety | e.g. "Riesling", "Cabernet Sauvignon" | Enthusiast |
| Appellation | e.g. "Bordeaux AOC", "Grand Cru" | Enthusiast |
| Tasting notes | Flavour notes, serving recommendation | Enthusiast |
| Drink from | From which year is it ready to drink? (year) | Enthusiast |
| Drink by | By when should the wine be drunk? | Enthusiast |
| Rating (50–100 points) | Professional points-based rating | Enthusiast |
| Storage location | e.g. "Rack 3, Shelf 2" | Enthusiast |
| Comment | Free text, e.g. "Gift from John" | Beginner + Enthusiast |
Tap "Save" to add the wine.
Note: If you want to leave Step 1 without saving (back arrow, top left), a dialog appears with the options "Save", "Discard" and "Cancel".
2.3 Viewing Wine Details
Tap on any wine in the list to open its detail page.
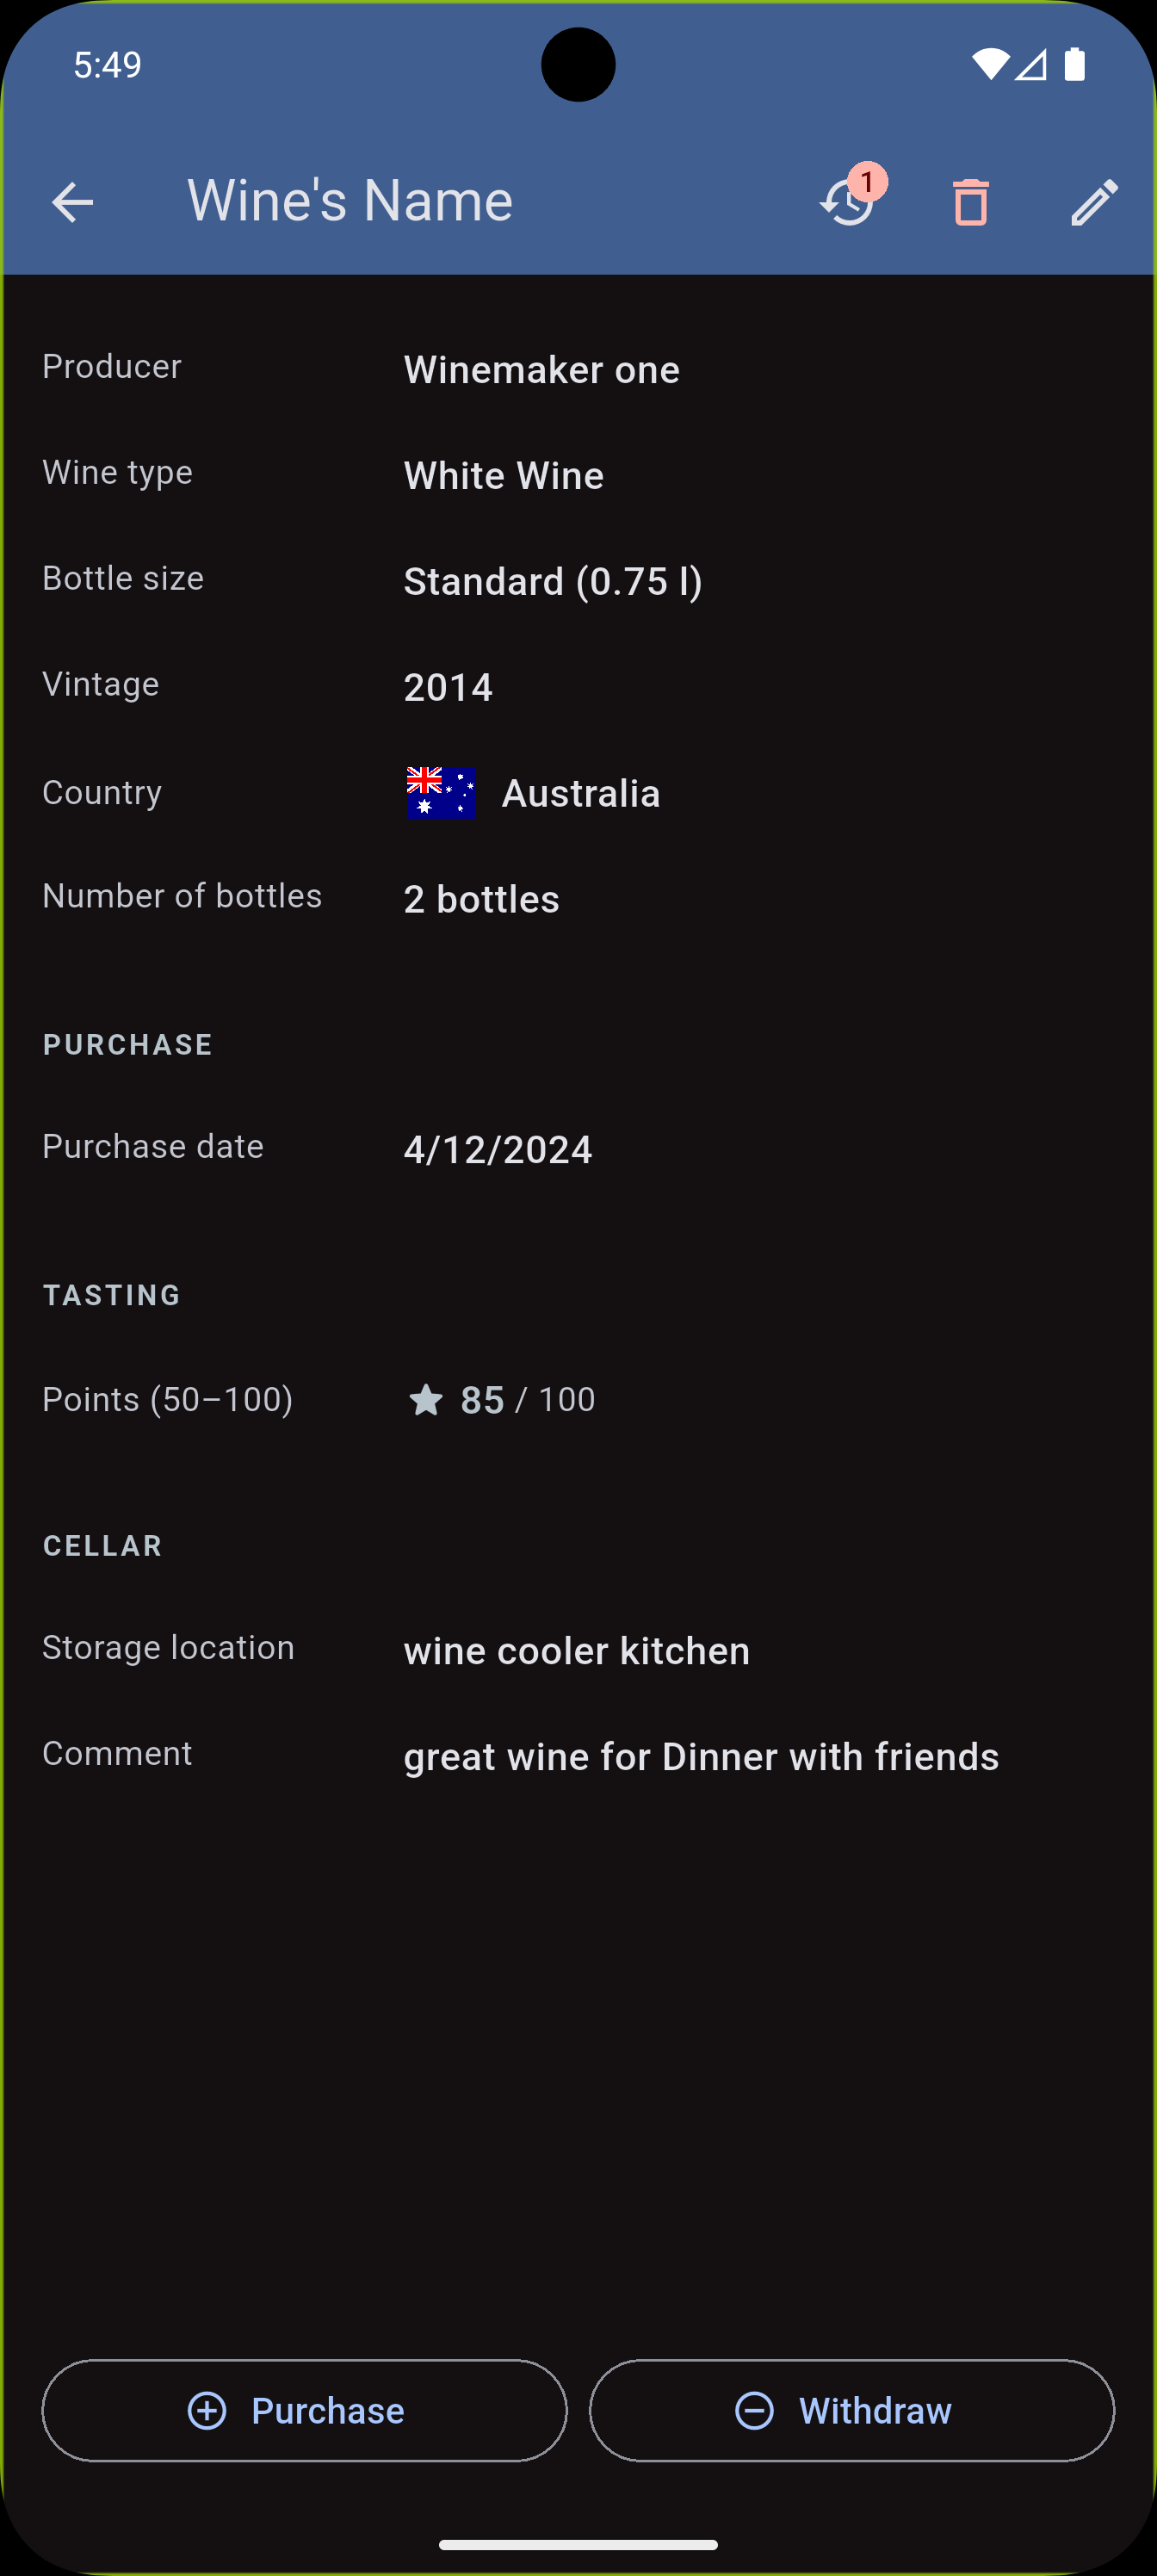
The detail page is divided into sections:
Header:
- Wine name (AppBar)
- Producer / Winery
- Wine type
- Bottle size
- Vintage, country with flag
- Region (Enthusiast only)
- Current stock
Purchase section (if available):
- Purchase date, purchase source
Tasting section (if available):
- Grape variety, appellation (Enthusiast)
- Tasting notes (Enthusiast)
- Drinking window from–to (Enthusiast)
- Rating (stars or points)
Cellar section (if available):
- Storage location (Enthusiast)
- Comment
Action bar at the bottom:
| Button | Function |
|---|---|
| Buy | Record a new purchase (increase stock) |
| Consume | Record consumption (decrease stock) – only visible when stock > 0 |
AppBar icons:
| Icon | Function |
|---|---|
| ⟲ History icon with number | Show purchase and consumption history for this wine only |
| Pencil icon | Edit wine |
| Trash icon | Delete wine |
2.4 Editing a Wine
- Open the wine detail page
- Tap the pencil icon (top right)
- Change the desired fields
- Tap "Save"
If you want to discard your changes, a confirmation dialog will appear.
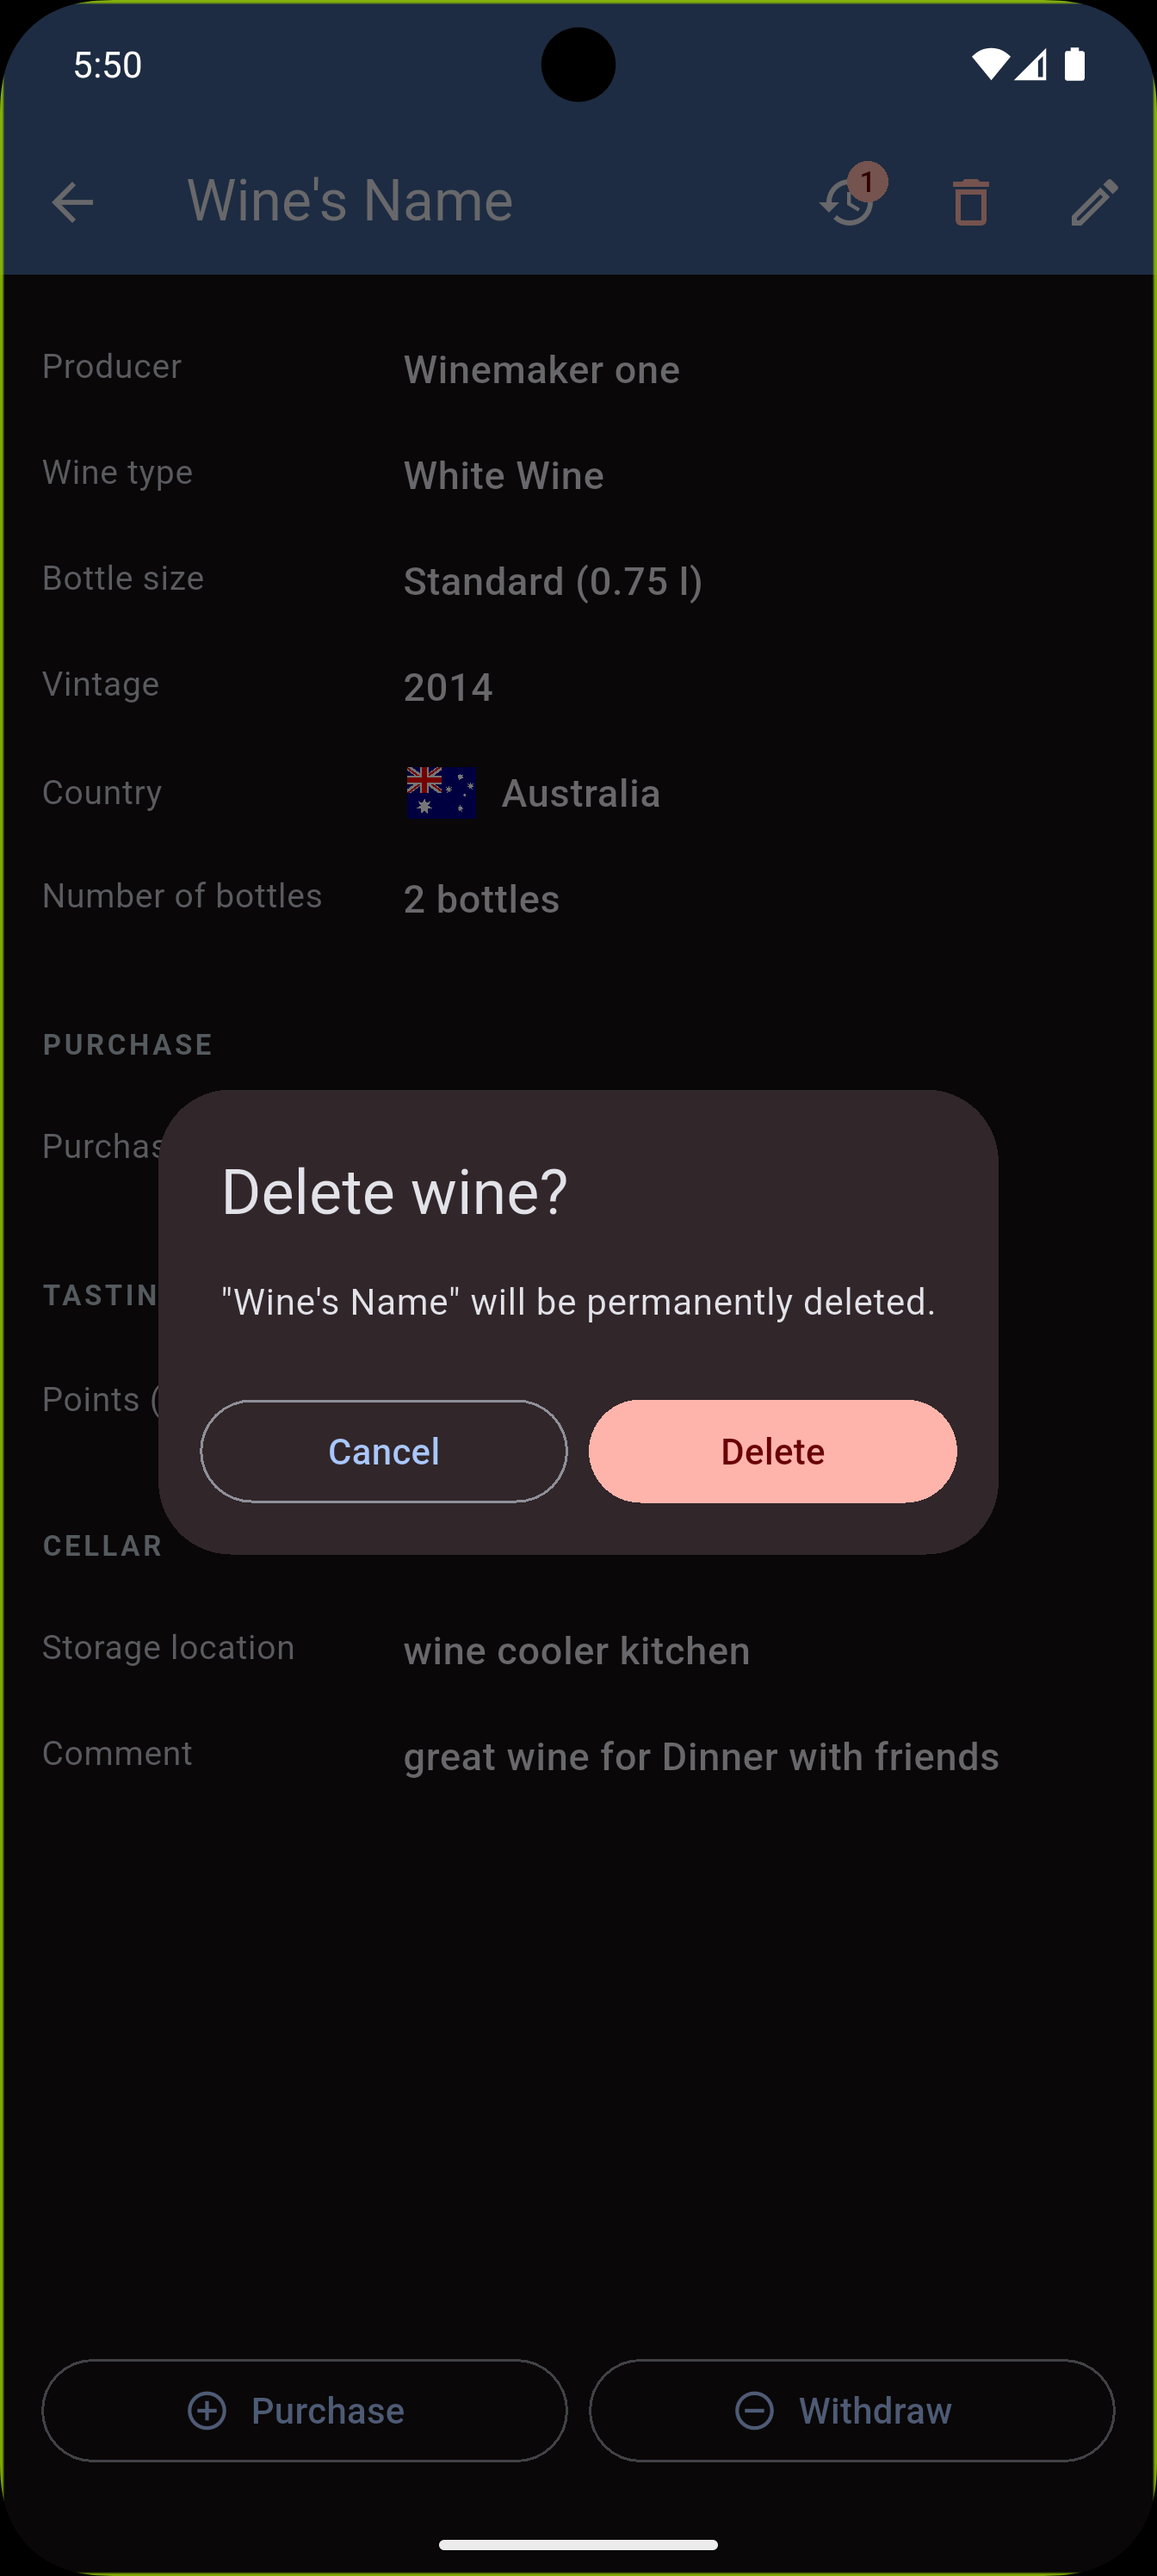
2.5 Deleting a Wine
Warning: Deleting a wine also permanently removes all associated purchase and consumption entries.
- Open the wine detail page
- Tap the red trash icon (top right)
- Tap "Delete" in the confirmation dialog
2.6 Filtering, Searching and Sorting
InWineTory gives you several ways to quickly find the right wine:
Search
Tap the search field at the top of the wine list. The search simultaneously covers: wine name, producer / winery, region, comment, purchase source.
Separate multiple search terms with spaces – all terms must match.
Filter: Wine Type
Tap the "Type" chip → a dialog opens. Select one or more wine types (e.g. Red + Port), then tap "Apply". The chip shows the number of active filters.
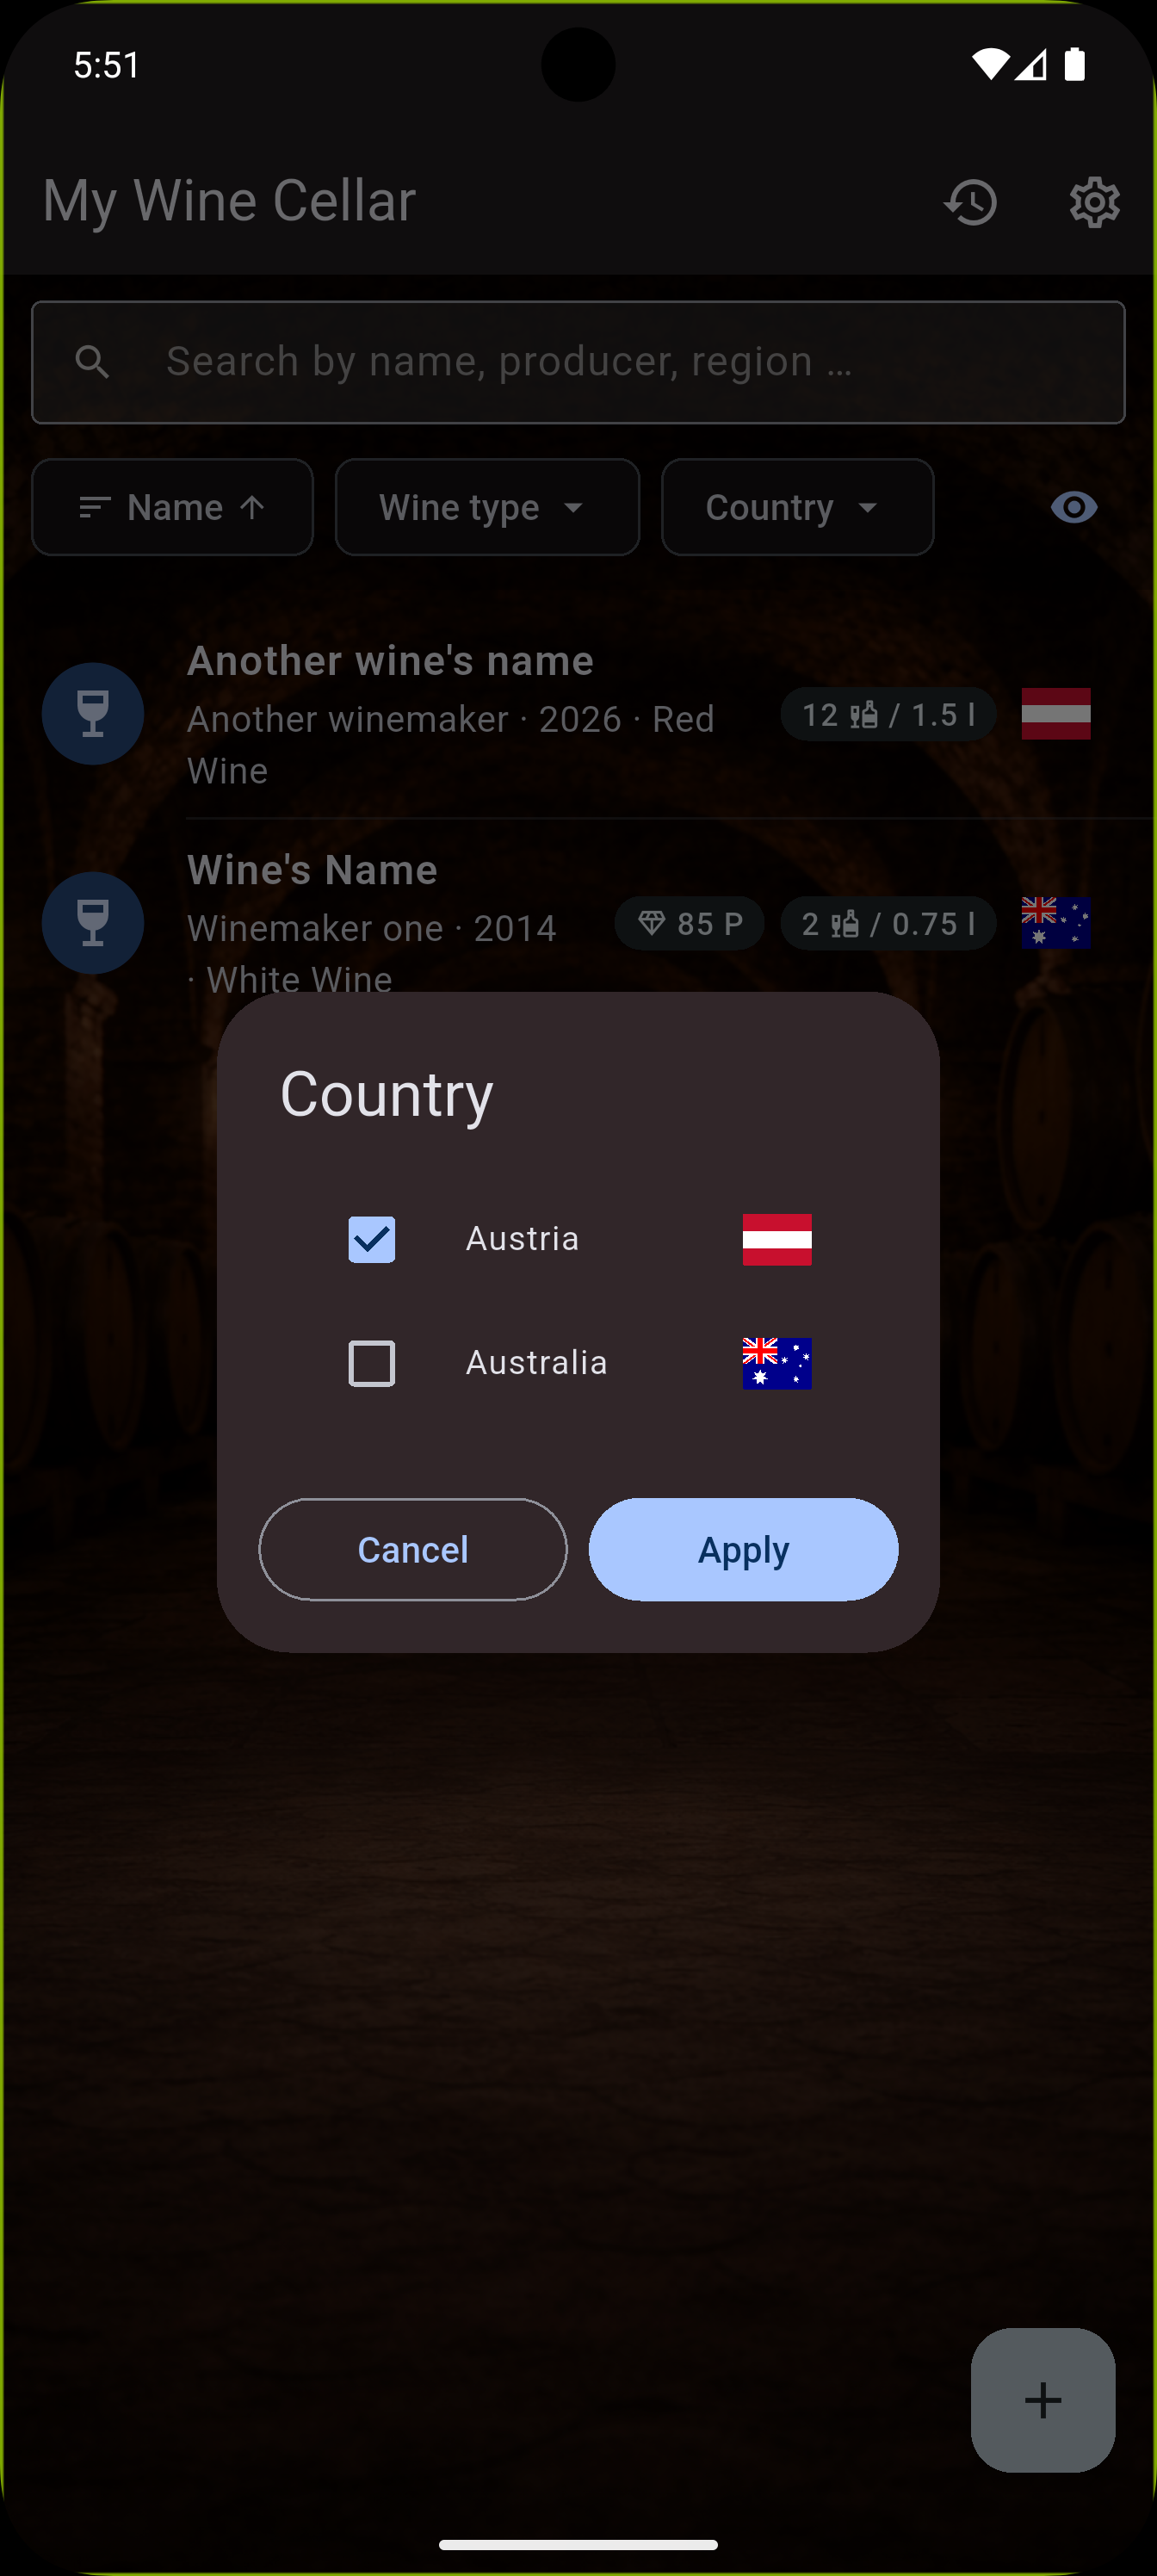
Filter: Country
Tap the "Country" chip → a dialog with country selection and flags opens. Select one or more countries, then tap "Apply".
Filter: Available Wines Only (Eye Icon)
By default, only wines with stock > 0 are shown.
- Eye active: Wines with stock 0 are hidden
- Eye inactive: All wines are shown (including empty ones)
Sorting
Tap the sort chip (with arrow icon) → a dialog opens.
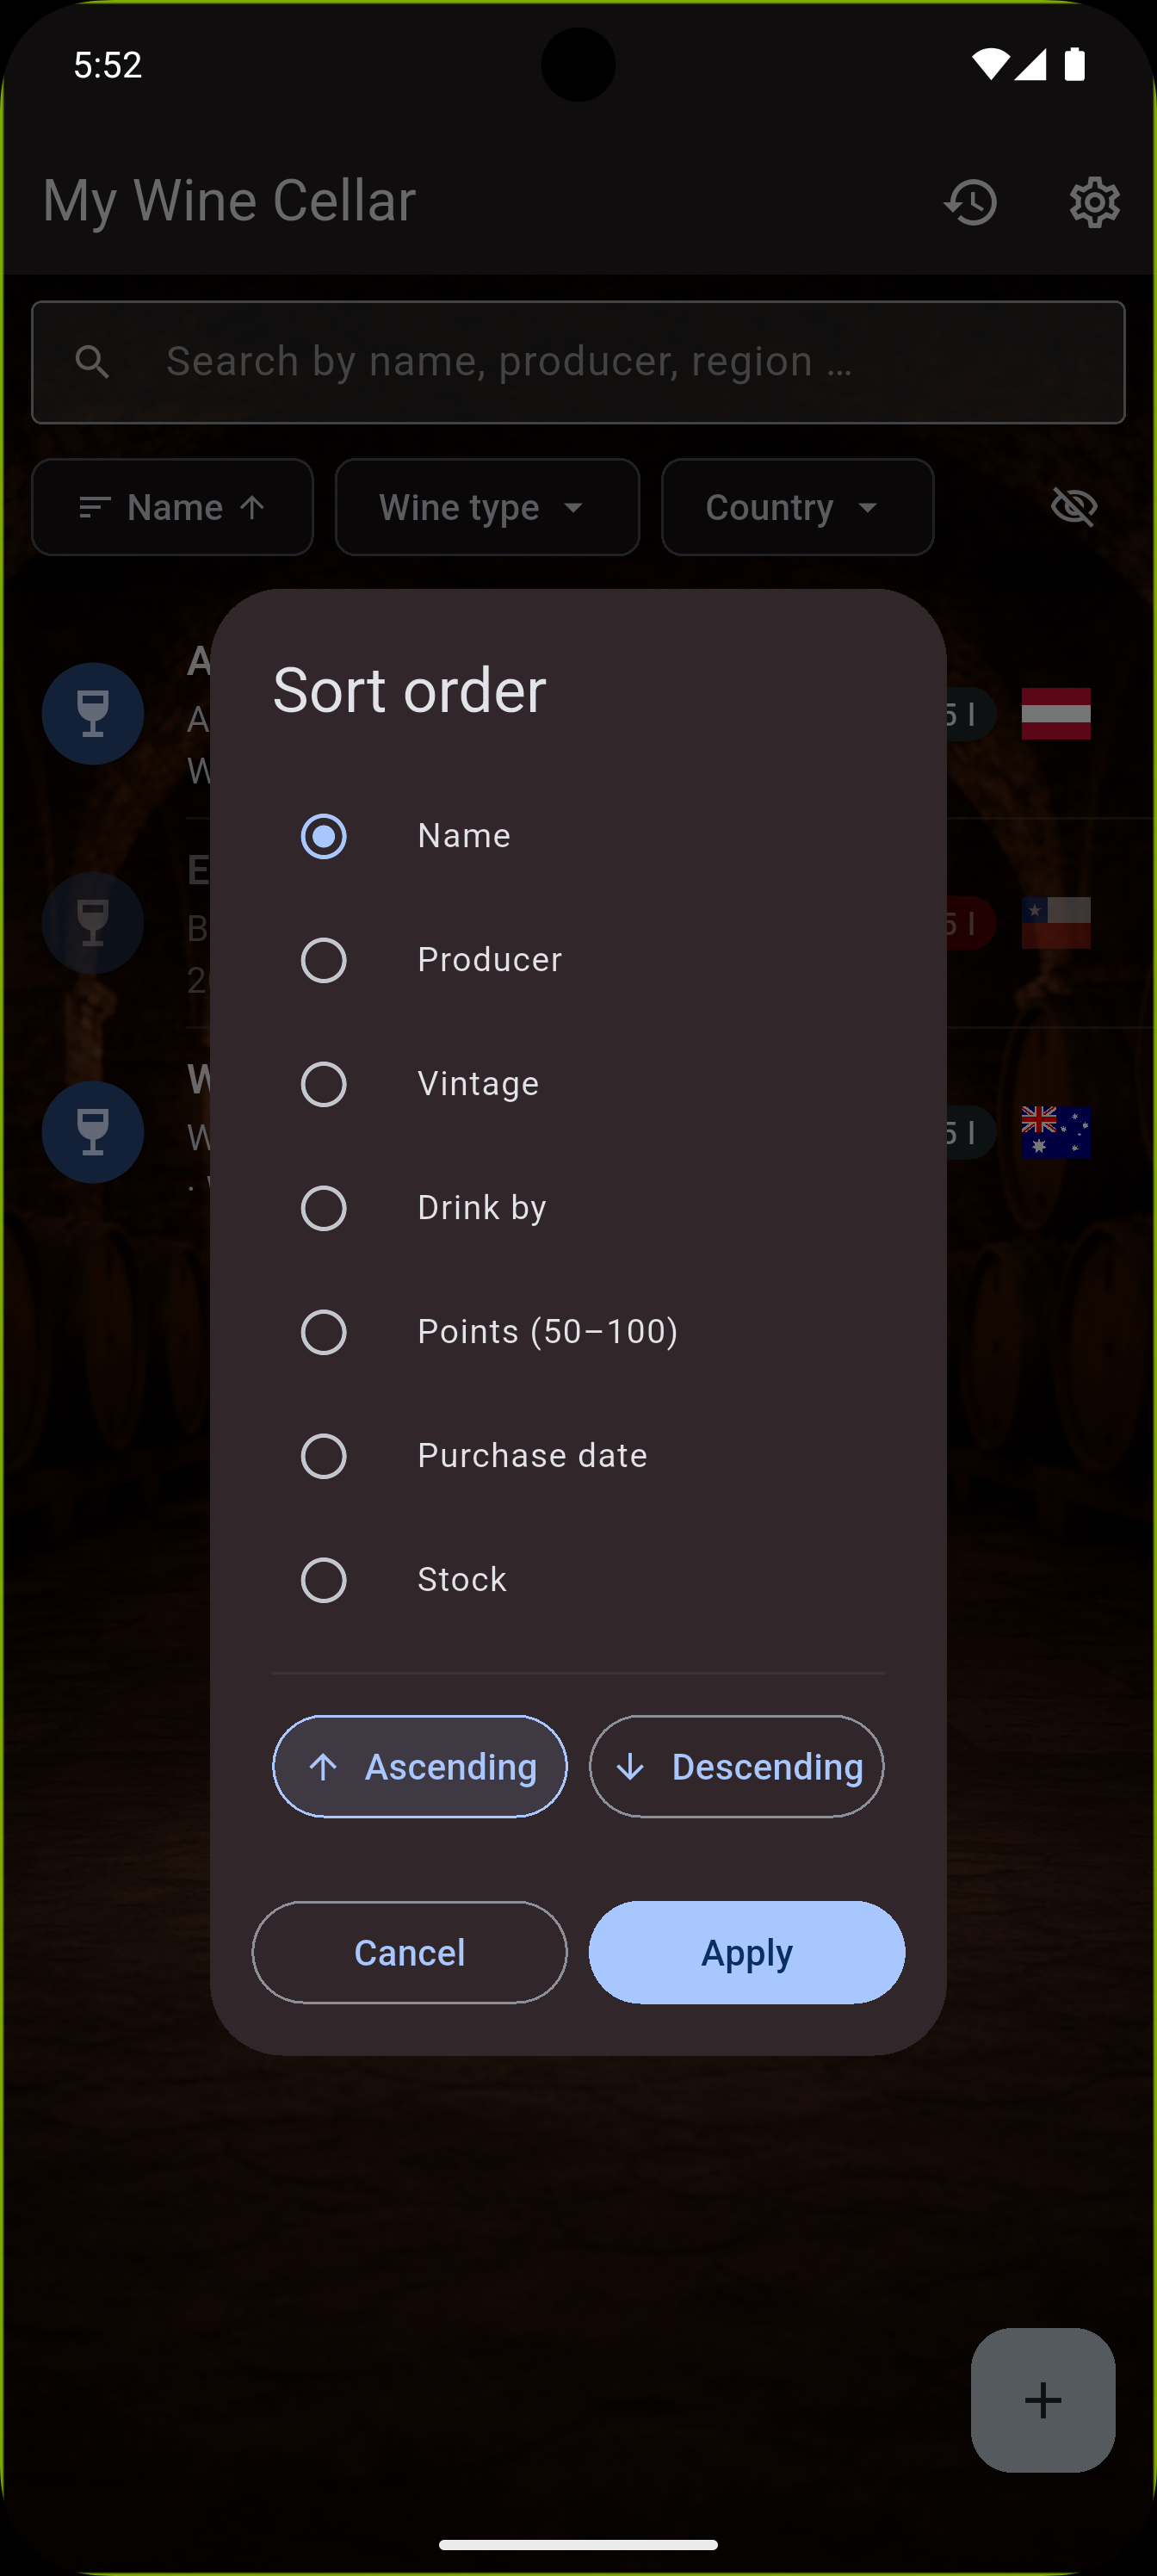
| Option | Description |
|---|---|
| Name | Alphabetically by wine name (default) |
| Producer | Alphabetically by producer |
| Vintage | By harvest year |
| Stock | By number of bottles |
| Rating ★ | By star rating (Beginner) |
| Rating pts. | By points rating (Enthusiast) |
| Purchase date | By date of last purchase |
| Drink by | By expiry date |
Direction: A→Z / Ascending or Z→A / Descending
Reset All Filters
When at least one filter is active, a reset icon appears in the filter bar. Tap it to reset all filters to their defaults.
3. Recording Purchases and Consumption
3.1 Recording a Purchase
Use this function when you buy additional bottles of an existing wine.
- Open the wine detail page
- Tap "Purchase" (at the bottom)
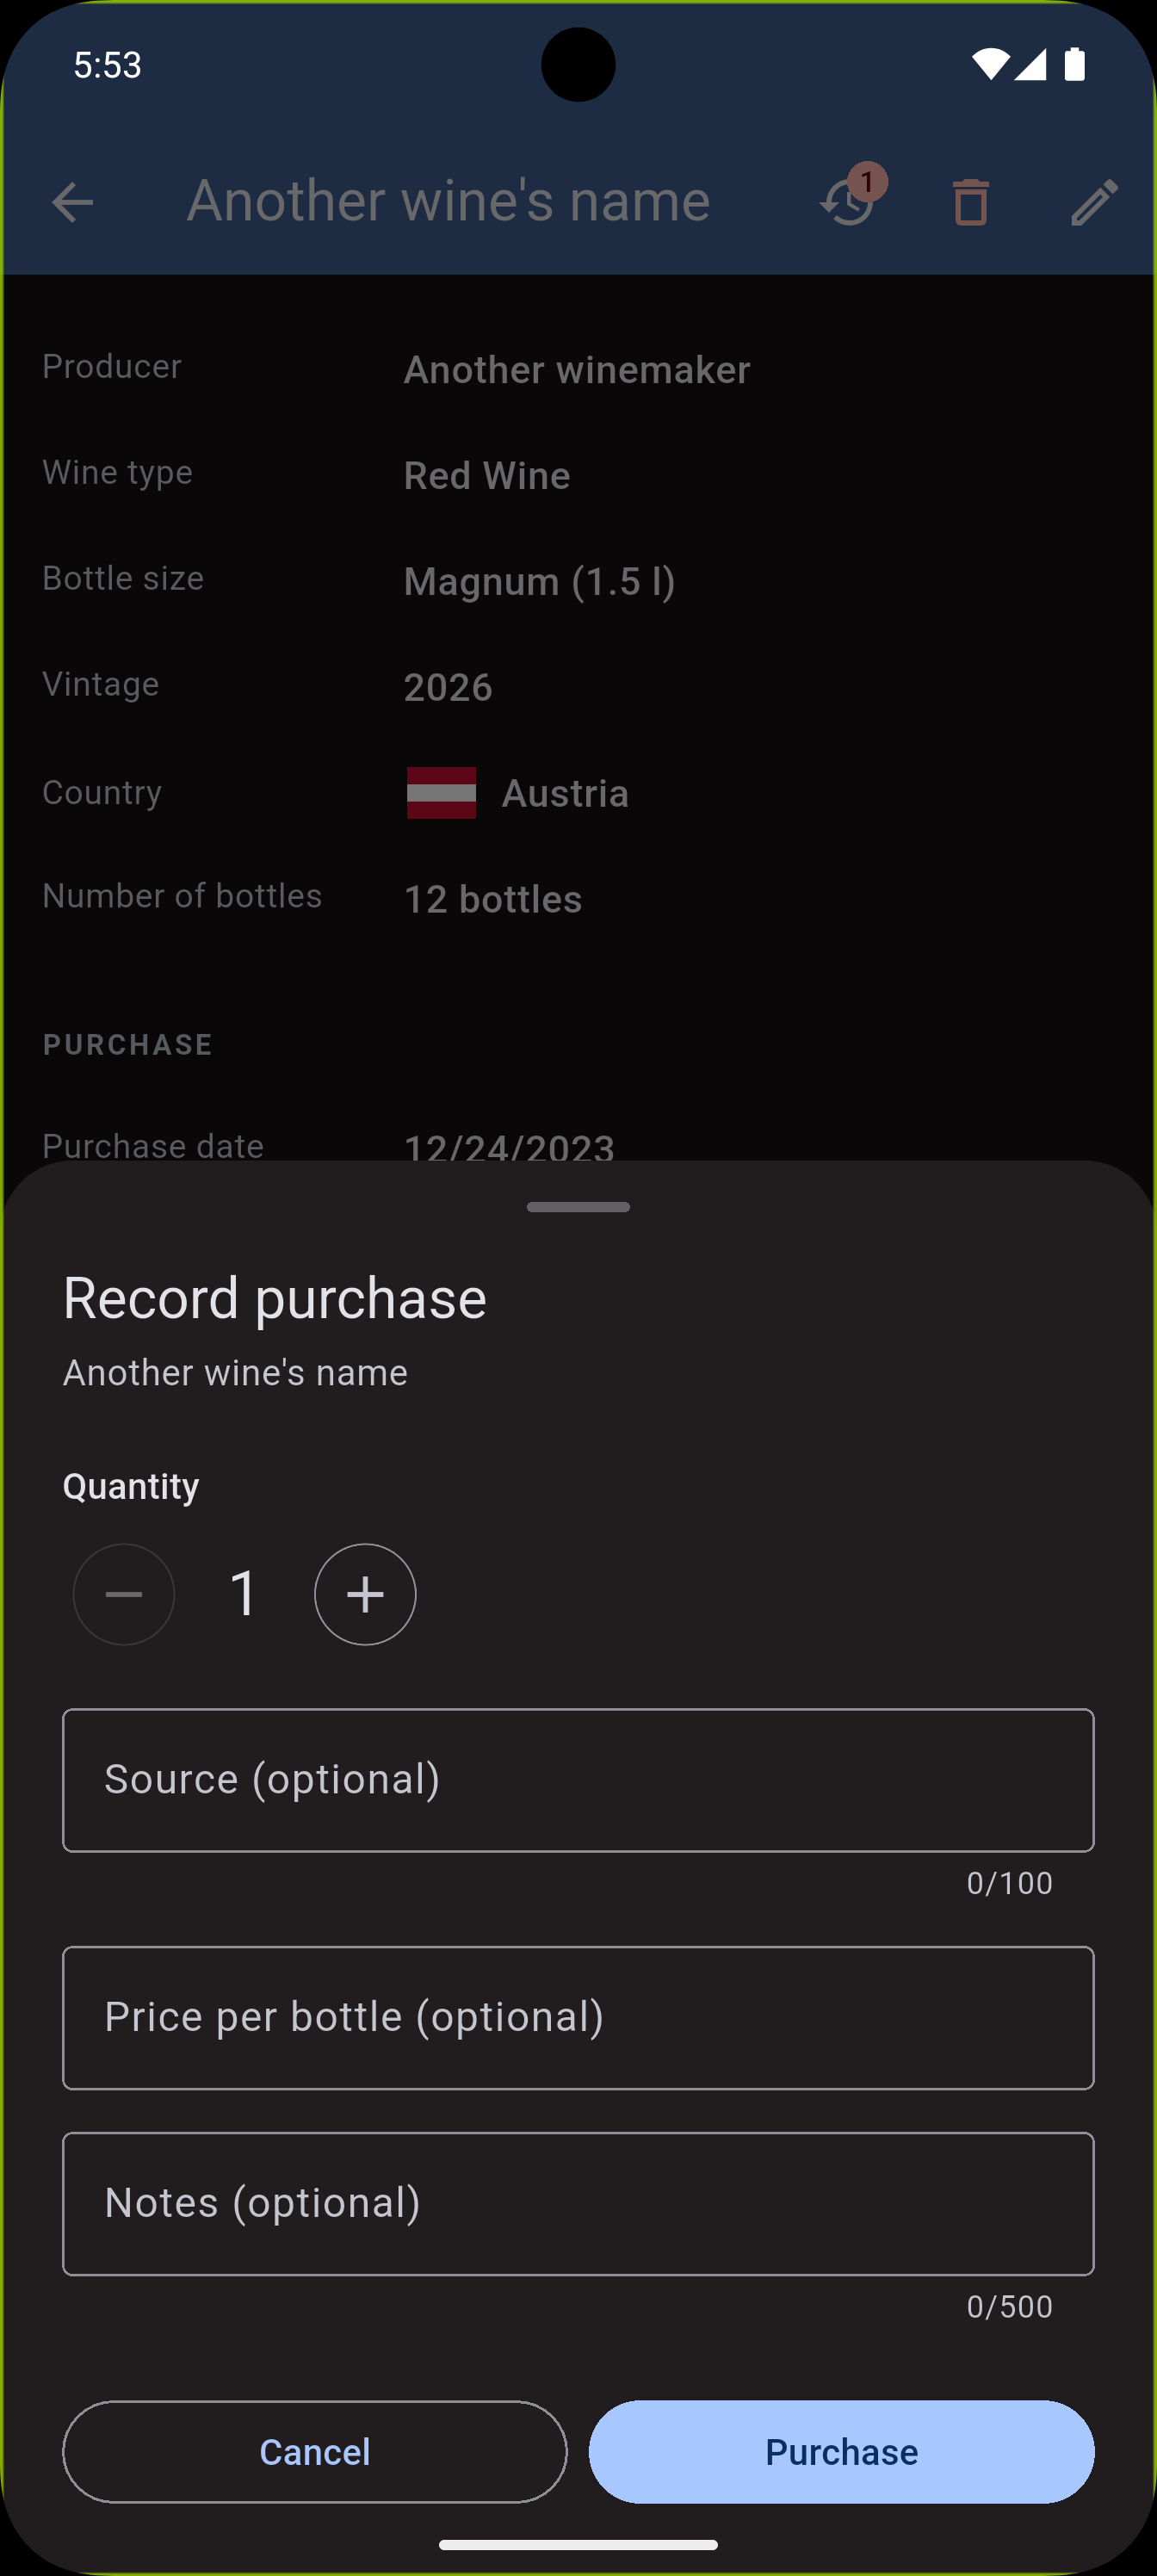
| Field | Description |
|---|---|
| Quantity | Number of bottles purchased (with +/- buttons) |
| Source | Retailer, winery, online shop, ... (optional) |
| Price per bottle | In your local currency (optional) |
| Notes | Free text, e.g. "Special offer" (optional) |
Tap "Purchase" to save the purchase. A brief confirmation appears at the bottom of the screen.
The wine's stock is automatically increased by the quantity entered.
3.2 Recording Consumption
Every time you open a bottle or take one from your cellar, you can record it here.
- Open the wine detail page (the "Consume" button is only visible when stock > 0)
- Tap "Withdraw" (at the bottom)
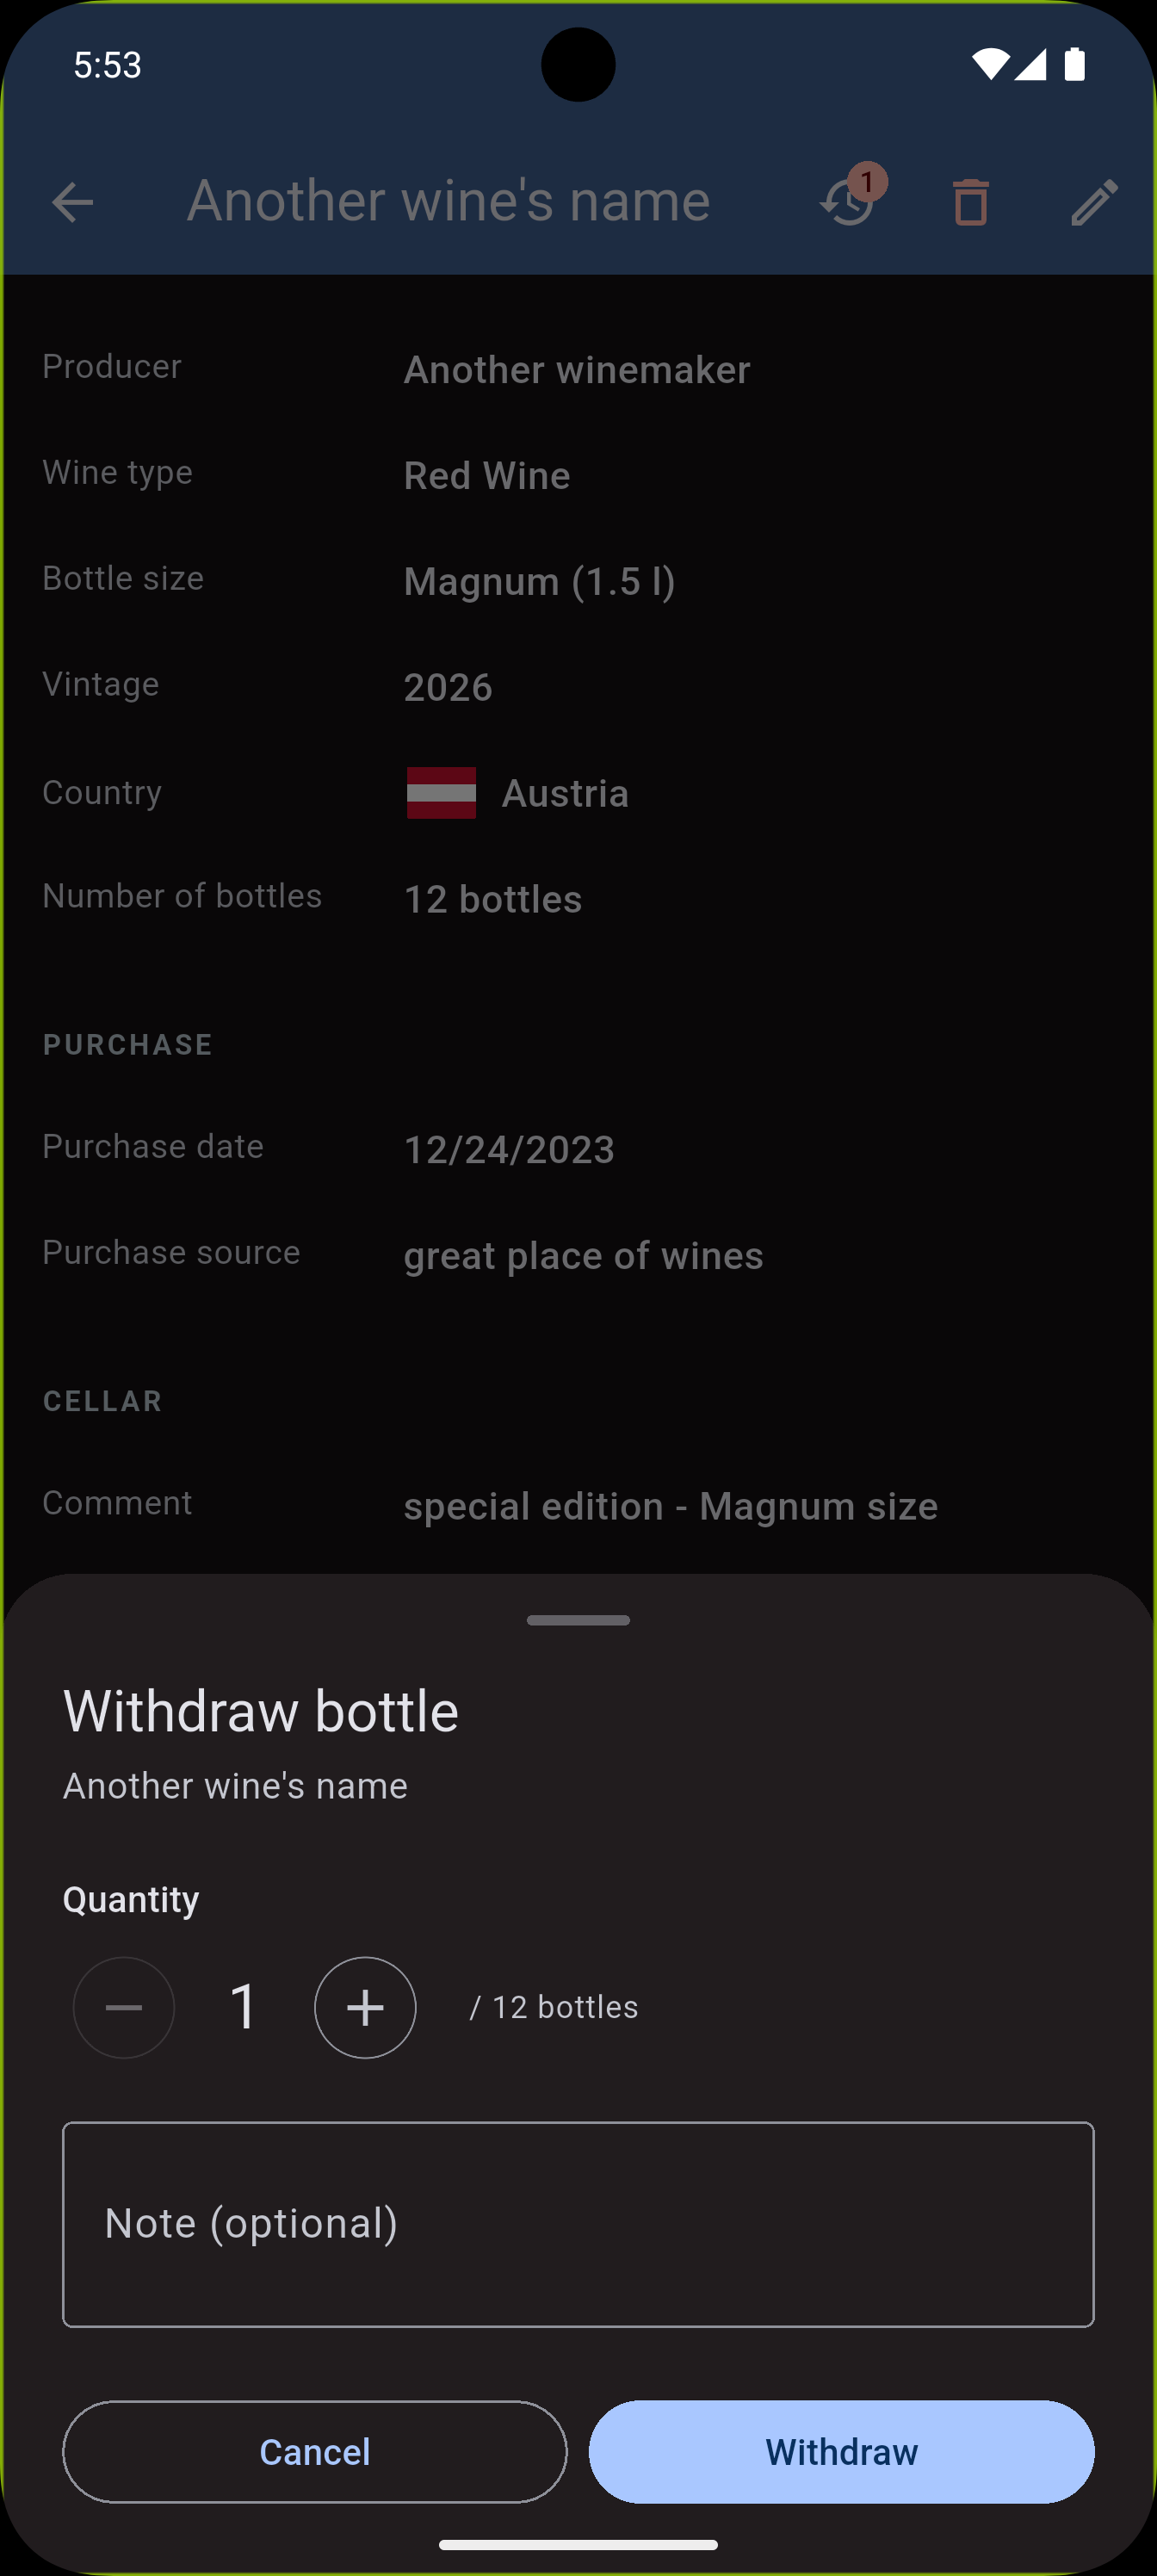
| Field | Description |
|---|---|
| Quantity | Number of bottles removed (max. = current stock) |
| Note | Optional, e.g. "Family dinner" |
Tap "Withdraw" to save.
The stock is reduced immediately. If it drops to 0, the button is hidden and the wine appears greyed out in the list.
3.3 Viewing the History
The history shows a chronological overview of all purchases and consumptions.
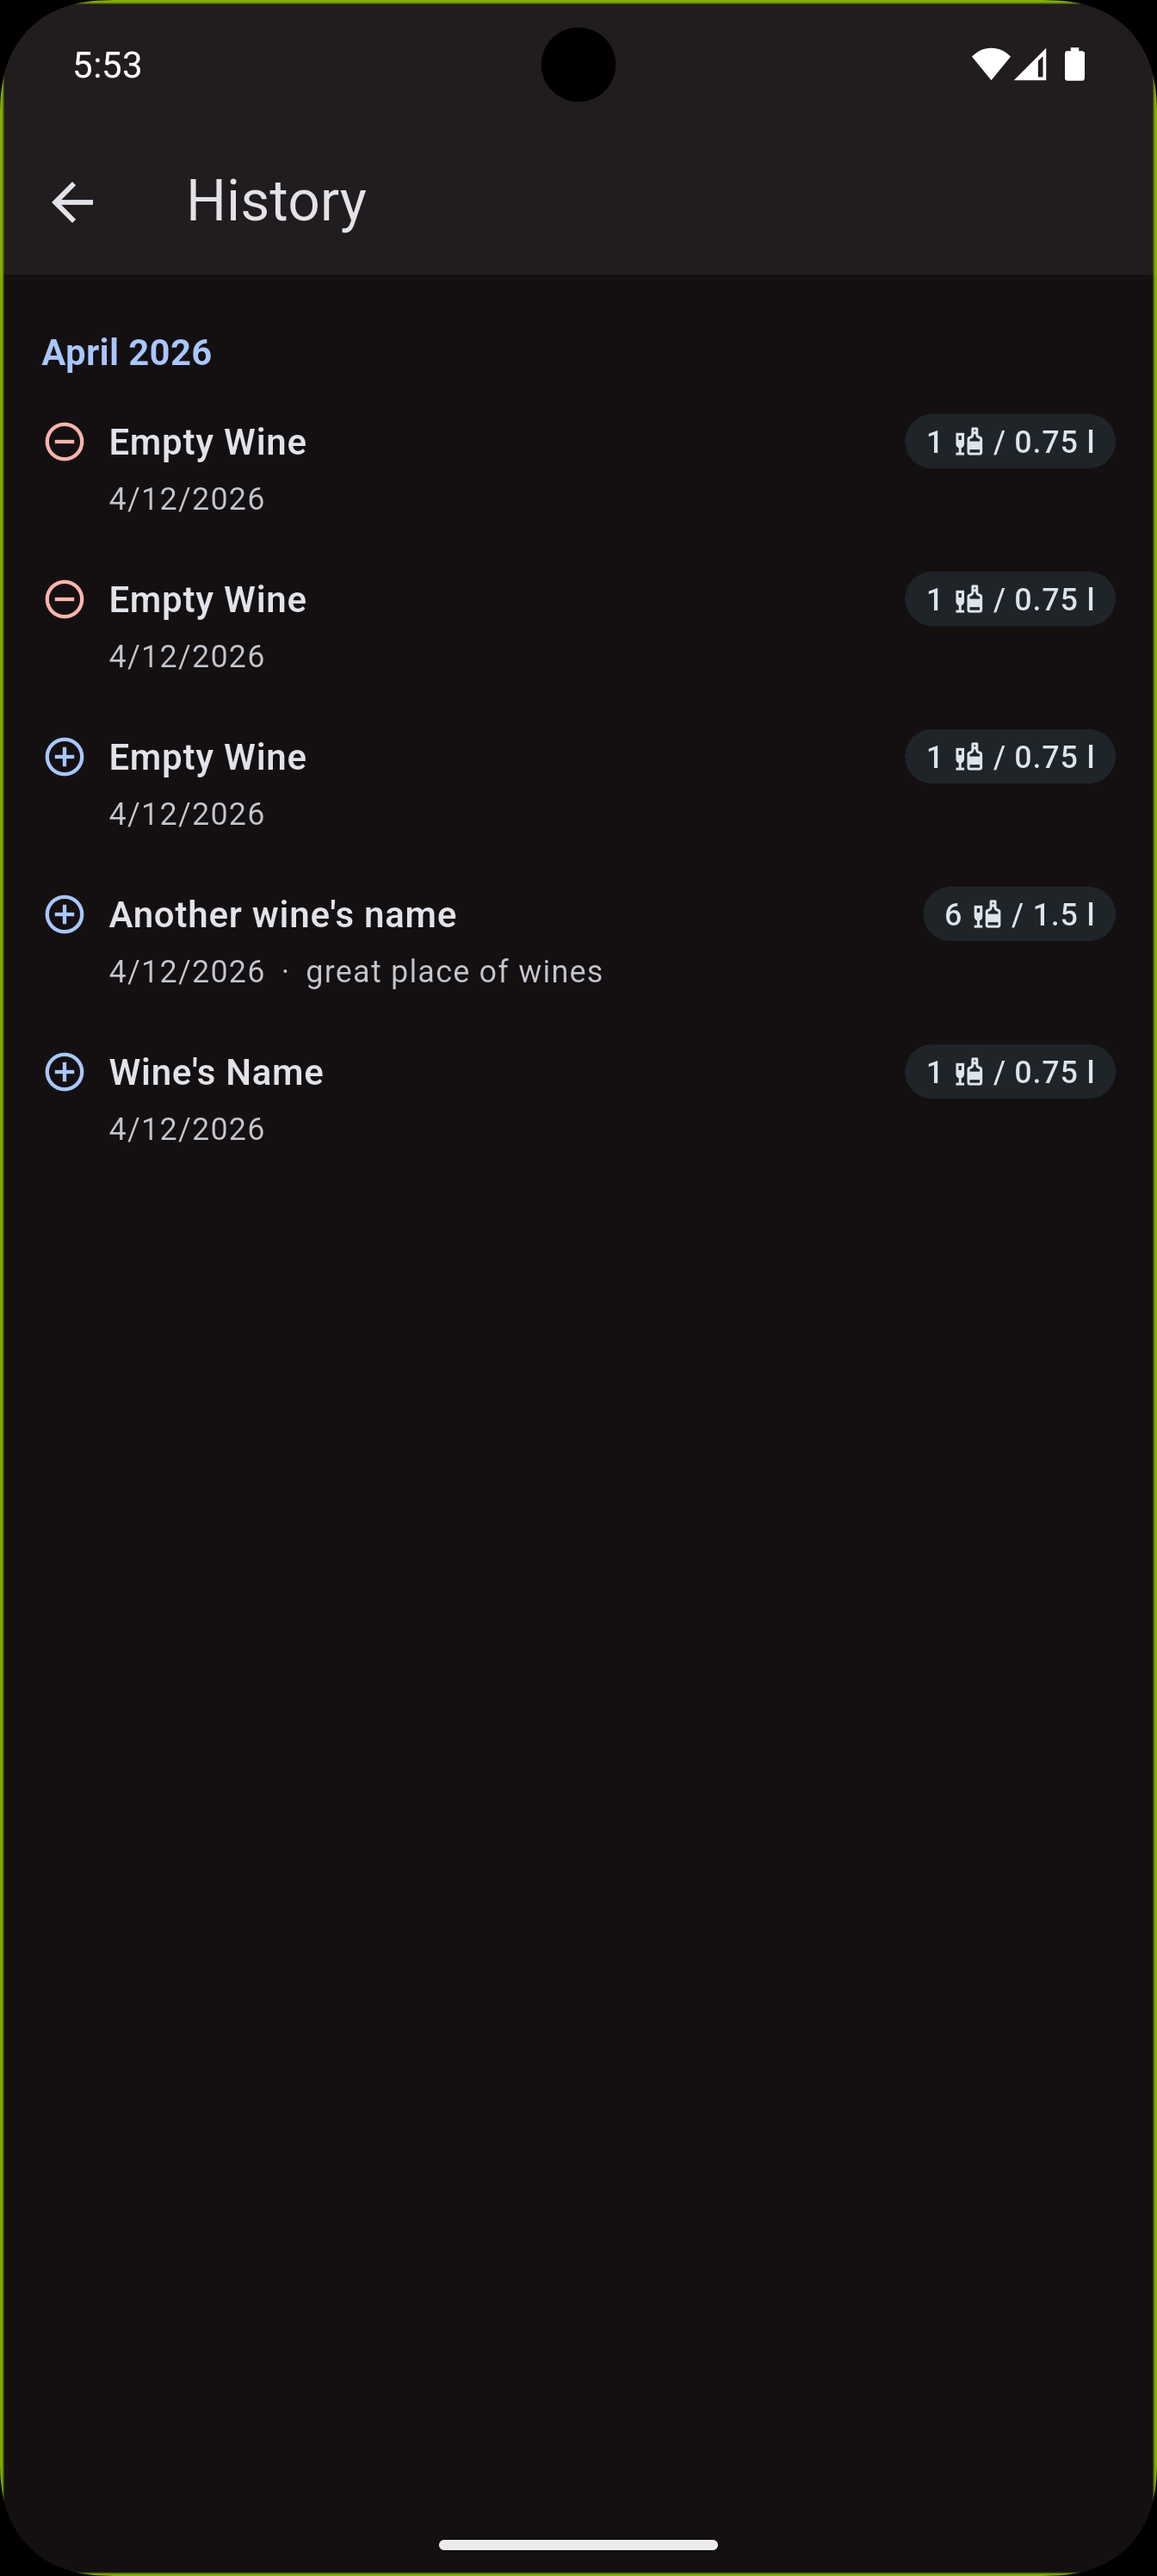
| Access point | Shows |
|---|---|
| History icon in the wine list AppBar | Complete history of all wines |
| History icon on the wine detail page (with number badge) | Only entries for this wine |
Entries are grouped by month. Purchase entry (blue icon): wine name, bottles, date, source, price, notes. Consumption entry (red icon): wine name, bottles, date, note.
Tap any entry to navigate directly to that wine's detail page.
4. Settings
Open Settings via the gear icon in the wine list AppBar. All settings take effect immediately – there is no Save button.
4.1 Changing the Language
| Option | Description |
|---|---|
| System language | App follows the device language |
| German | App always in German |
| English | App always in English |
4.2 Switching Mode: Beginner or Enthusiast
| Mode | Description |
|---|---|
| Beginner | Core fields + 5-star rating. Ideal to get started. |
| Enthusiast | All fields + 100-point rating. For wine connoisseurs. |
Switching only changes the visibility of fields. No data is lost. Data entered in Enthusiast mode (e.g. storage location) remains saved even if you switch back to Beginner.
4.3 Choosing a Color Theme
| Theme | Description |
|---|---|
| Wine Red | Warm red – classic wine atmosphere |
| Dark Blue | Cool blue – modern, elegant design |
4.4 Backup & Restore
The backup feature saves your entire wine cellar – all wines, purchase and consumption records – in a single file on your device. You can find it in Settings under the "Data" section.
Creating a Backup
- Open Settings (gear icon, top right)
- Go to the "Data" section → tap "Create Backup"
- A save dialog opens – choose a location and file name
- The backup file is saved (file extension
.json)
Tip: Create backups regularly – especially before making major changes. Store the file somewhere safe, e.g. in your cloud storage or email it to yourself.
Restoring a Backup
- Open Settings (gear icon, top right)
- Go to the "Data" section → tap "Restore Backup"
- A file open dialog appears – select a previously saved
.jsonbackup file - A confirmation dialog informs you that all current data will be permanently replaced
- Tap "Restore" to proceed
Warning: Restoring overwrites all current data completely. Always create a fresh backup first to prevent data loss.
If the backup contains more bottles than your current plan allows, an error message with the exact numbers is shown – the database remains untouched in that case.
4.5 Diagnostics / Support: Sharing Log Files
The "Diagnostics / Support" section in Settings lets you share log files with the developer. This is useful when the app behaves unexpectedly or an error has occurred.
- Open Settings (gear icon, top right)
- Scroll down to the "Diagnostics / Support" section
- Available log files are listed with their date and file size
- Tap the share icon next to the file you want to send
- A disclaimer dialog appears: log files contain no passwords, but may include wine data and device information
- Tap "Share" → the platform's native share dialog opens (email, messenger, AirDrop, etc.)
Tip: Sharing log files is entirely voluntary and helps reproduce issues and improve the app. You decide whether and with whom to share a file.
Log files are deleted automatically after 7 days. Older files are therefore no longer available.
5. Field Overview by Mode
| Field | Beginner | Enthusiast |
|---|---|---|
| Name | ✓ | ✓ |
| Producer / Winery | ✓ | ✓ |
| Wine type | ✓ | ✓ |
| Bottle size | ✓ | ✓ |
| Vintage | ✓ | ✓ |
| Country | ✓ | ✓ |
| Stock | ✓ | ✓ |
| Purchase date | ✓ | ✓ |
| Purchase source | ✓ | ✓ |
| Comment | ✓ | ✓ |
| Rating (1–5 stars) | ✓ | – |
| Region | – | ✓ |
| Appellation | – | ✓ |
| Grape variety | – | ✓ |
| Storage location | – | ✓ |
| Drink from (year) | – | ✓ |
| Drink by (date) | – | ✓ |
| Tasting notes | – | ✓ |
| Rating (50–100 points) | – | ✓ |
6. Frequently Asked Questions (FAQ)
What happens to my data when I switch modes?
Nothing. All data is preserved. In Beginner mode, the Enthusiast fields are simply hidden – they remain stored in the database.
Why is a wine not showing in the list?
The "Available wines only" filter (eye icon) is probably active. Wines with stock 0 are hidden in this case. Tap the eye icon or the reset icon to show all wines.
Can I add the same wine with different vintages or bottle sizes?
Yes. Each wine + vintage combination is a separate entry. For example, add "Château Margaux 2015", "Château Margaux 2018 – 0.75 l" and "Château Margaux 2018 – 1.5 l" as separate entries.
How do I add a new delivery of an existing wine?
Open the wine and tap "Buy". This increases the stock and logs the purchase in the history. Do not create a new wine entry – that would create a duplicate.
What does the number on the history icon in the detail view mean?
This number indicates that tapping the icon takes you to the history view for that specific wine, showing only its entries.
Is my data uploaded to the cloud?
No. InWineTory stores all data exclusively on your device. No internet connection is required.
How do I distinguish "Drunk" from "Given away"?
The consumption function currently does not distinguish between drinking and giving away. Use the note field to record the reason, e.g. "Brought to the Smiths' dinner".
Can I restore my backup on a different device?
Yes. Save the .json file to your cloud storage (e.g. iCloud Drive, Google Drive) or email it to yourself. On the new device, open InWineTory → Settings → "Restore" and select the file.
Can I open my backup in Excel?
The .json file is a JSON text file and can be opened with any text editor. For direct import into Excel or other spreadsheet applications, a CSV export is planned for a future version.
What is in a log file – is my data safe?
Log files contain technical event records (e.g. "Database opened", "Backup created") and error messages. They contain no passwords and no full wine list. However, wine names or device information may appear. The app explicitly informs you of this before you share a file.